Getting Started
Everything you need to run your first campaign
BacklinkTitan is a Windows-only desktop application that automates backlink building across 1,000+ platforms. Everything runs locally on your machine — no cloud subscription, no data leaving your computer.
System Requirements
| Requirement | Detail |
|---|---|
| OS | Windows 10 or Windows 11 (64-bit only) |
| RAM | 8 GB minimum, 16 GB recommended when running AI features |
| Storage | ~3 GB free (app + BacklinkTitan browser engine + built-in AI model) |
| Internet | Required during campaigns. Proxies optional but recommended for high-volume runs. |
Installation
Set up BacklinkTitan in under 10 minutes
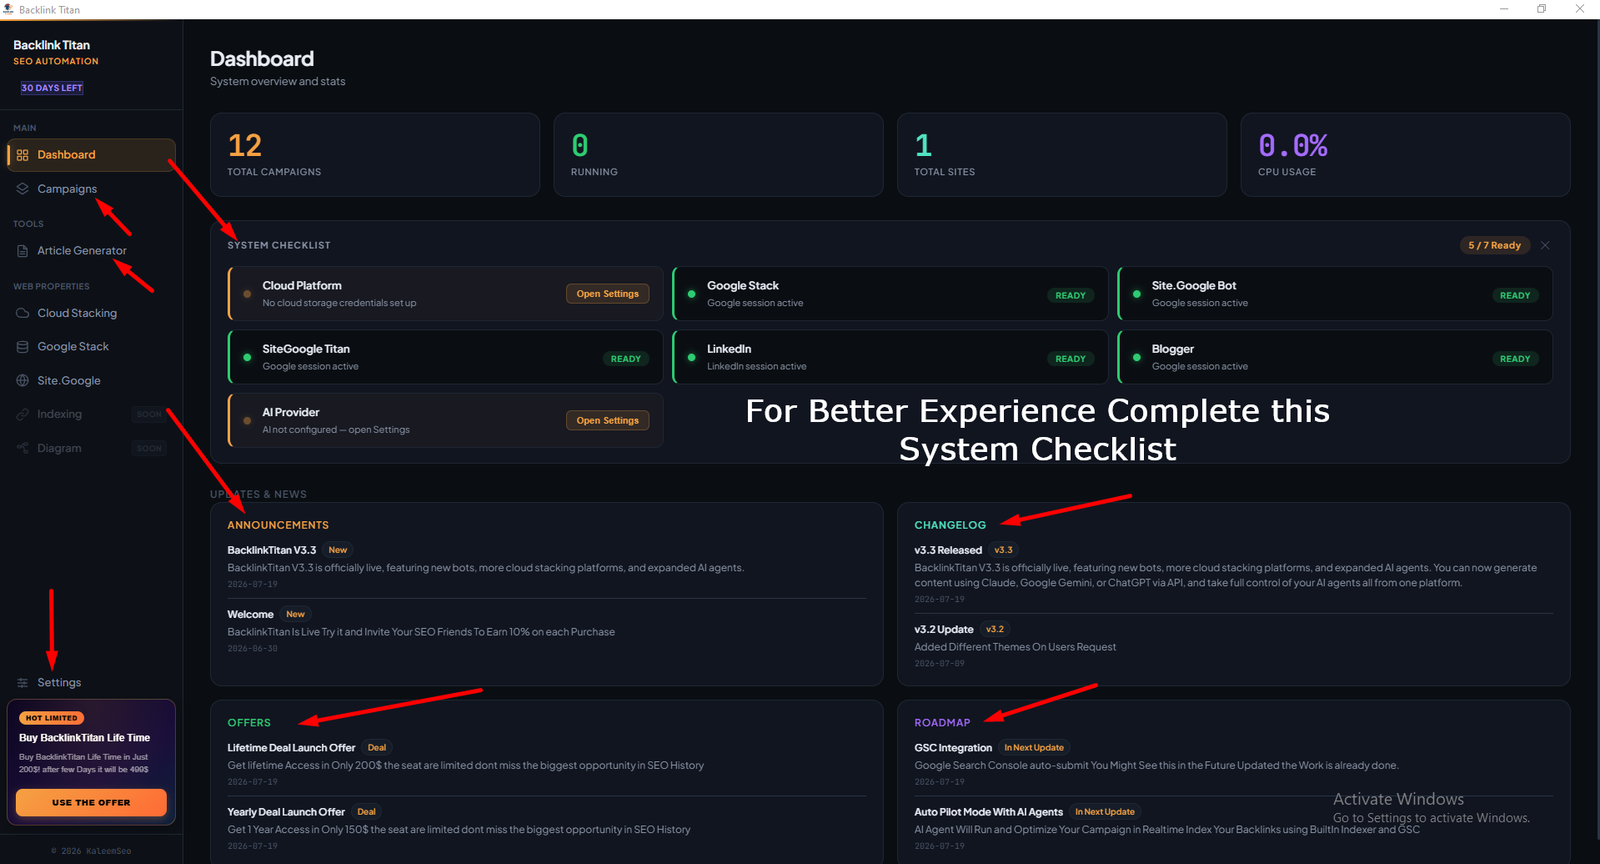
BacklinkTitan.exe. Windows Defender SmartScreen may warn you — click More info → Run anyway. The app is safe; the warning appears because it is not yet a signed publisher.<img src="screenshots/installation.png" alt="BacklinkTitan installation complete">
License Activation
One-time setup, tied to your machine
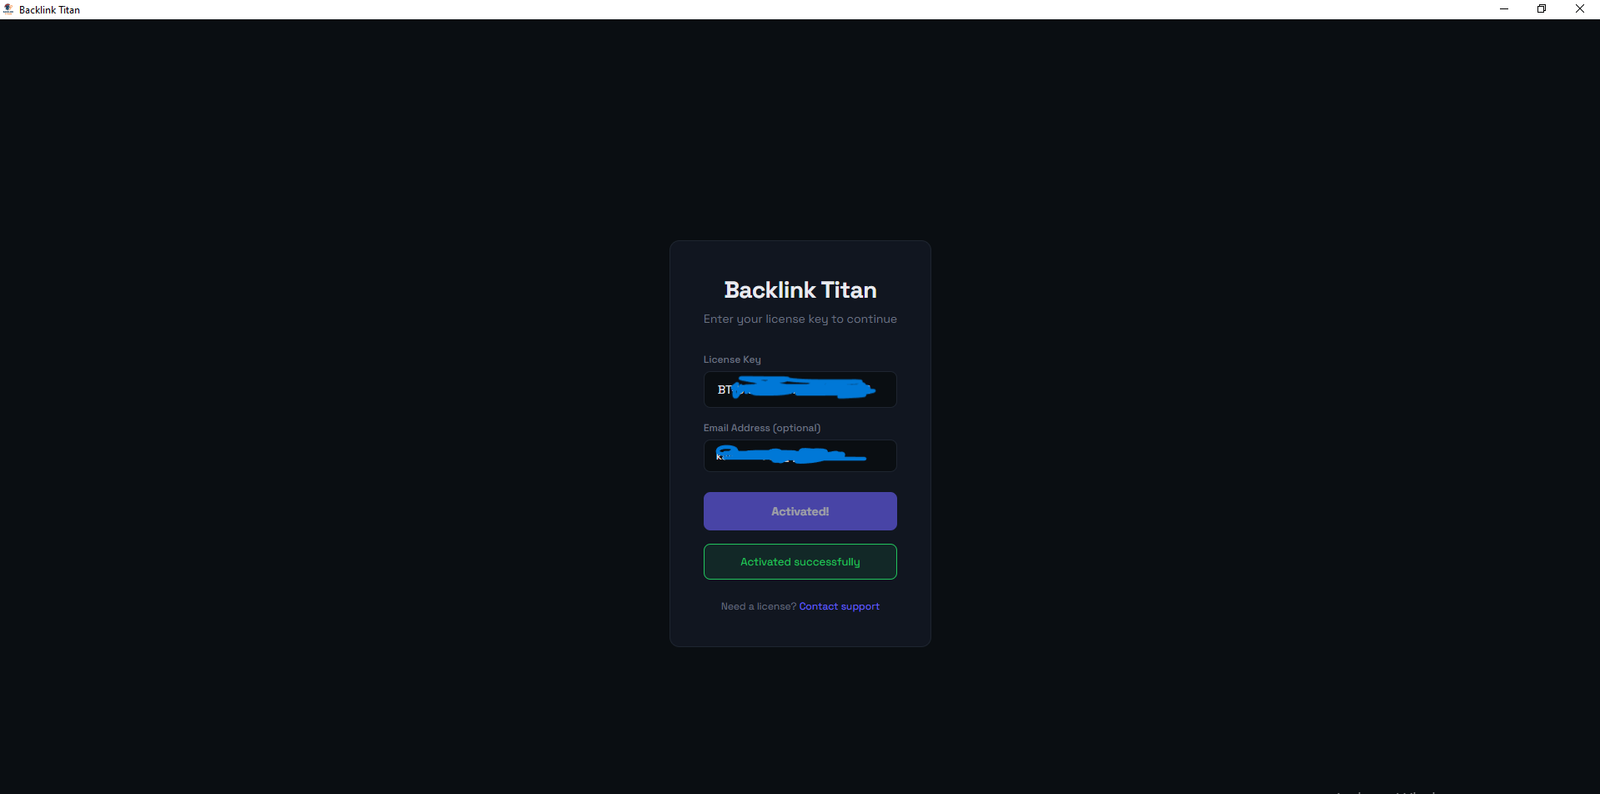
Your license is tied to one Windows machine at a time. Activation is automatic — the app calls home when you enter your key and the license is validated instantly.
BT-.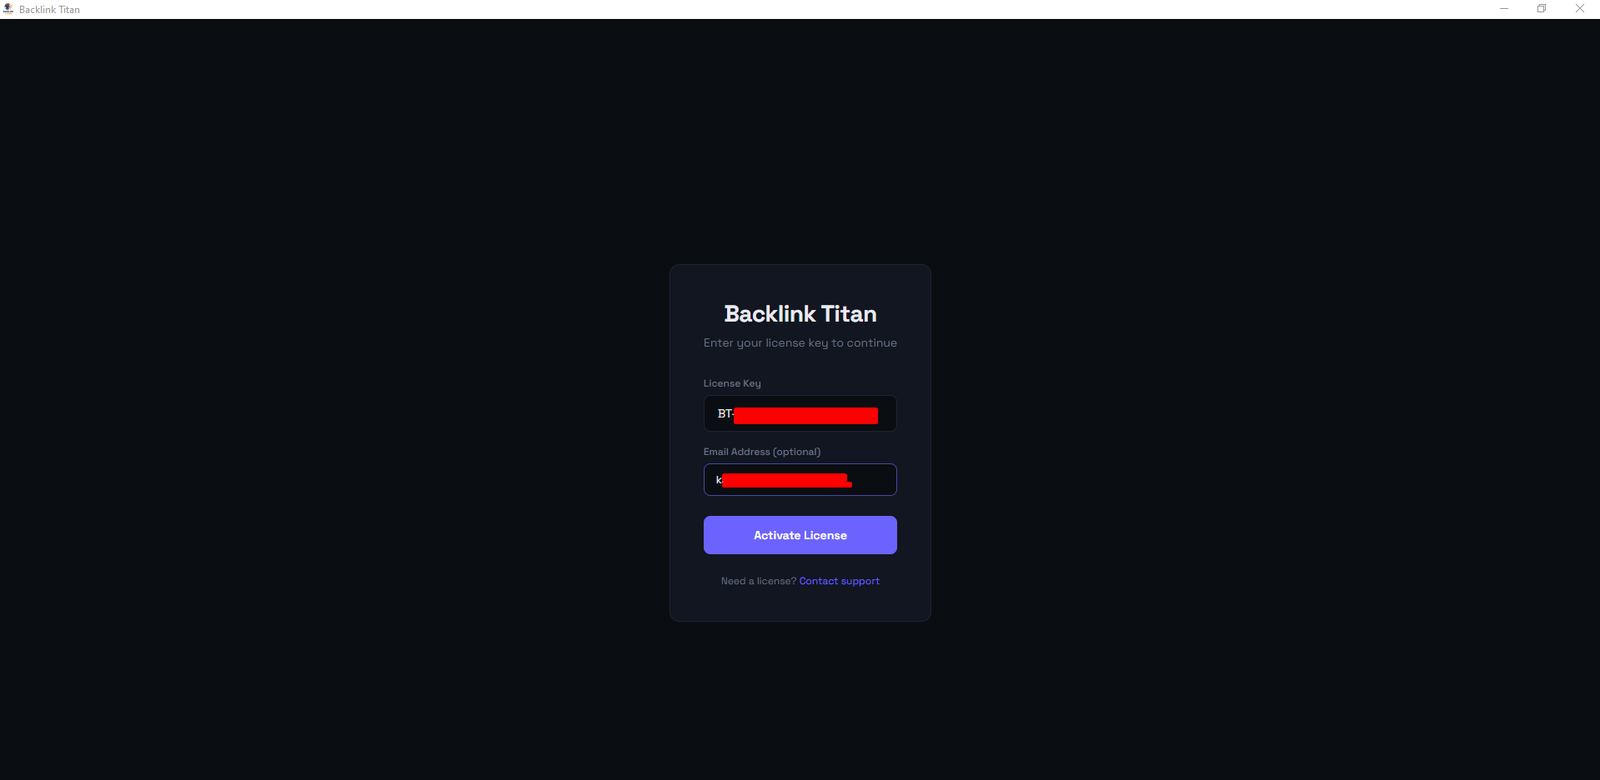
Profile Backlinks
Register accounts on 100+ sites with your URL in the bio
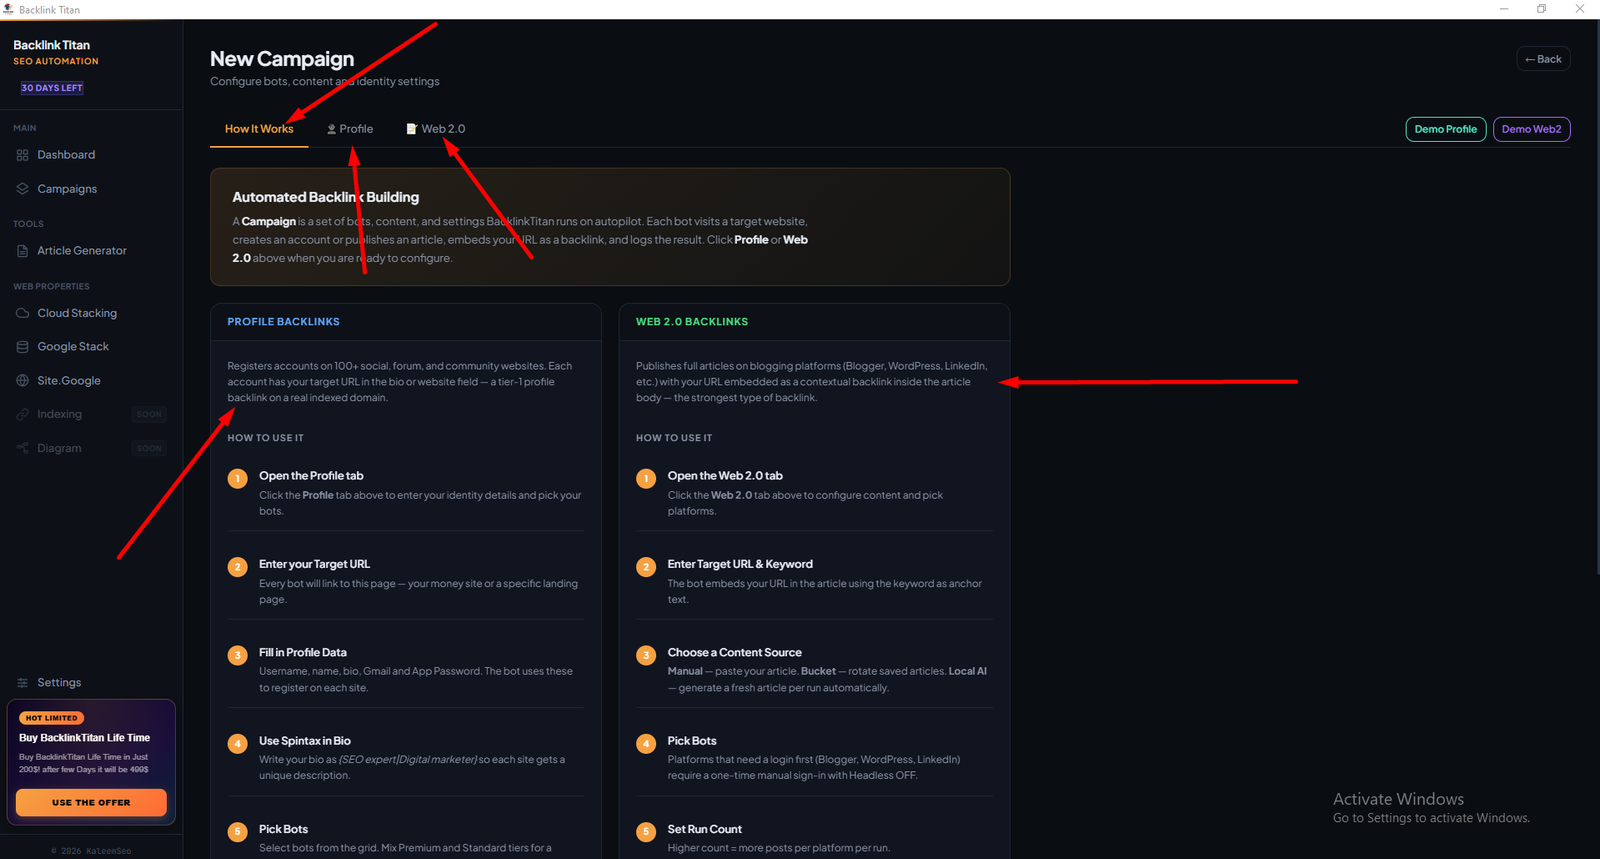
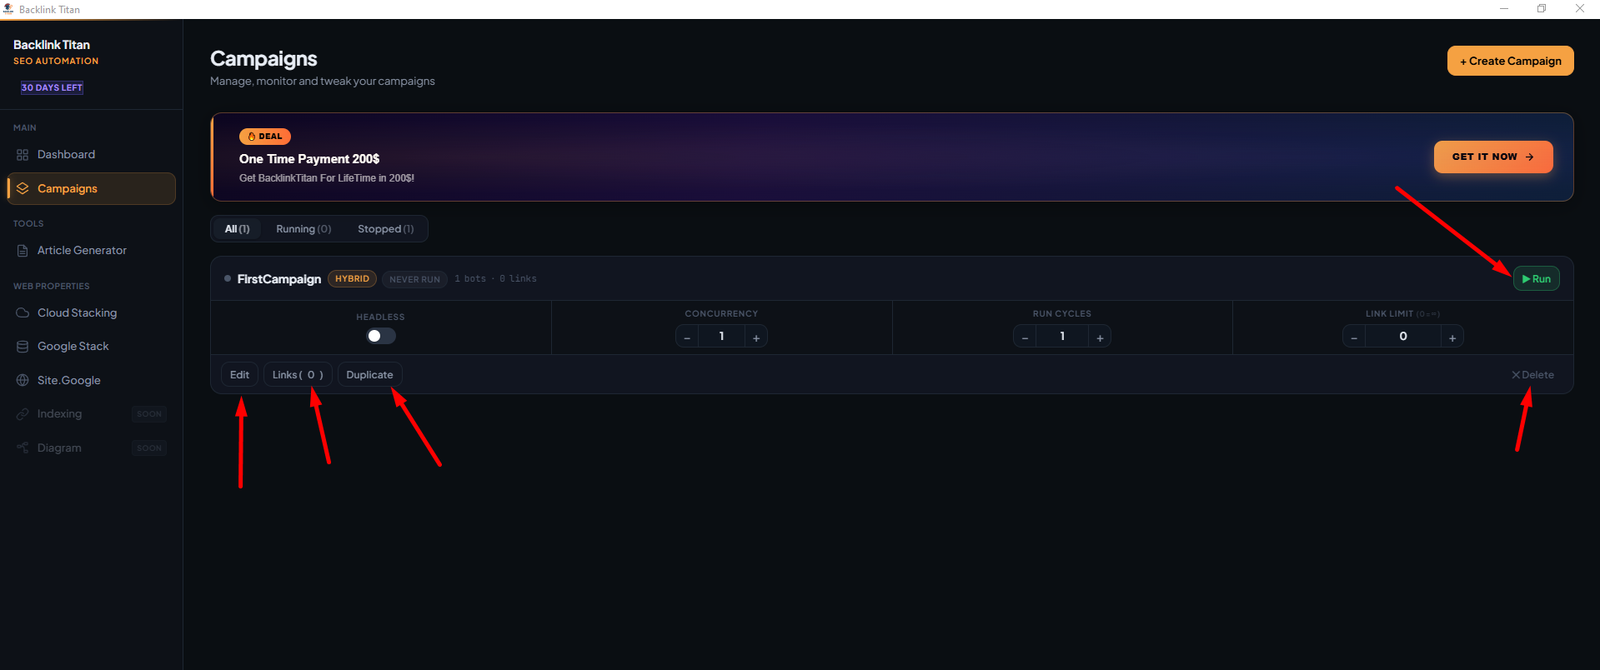
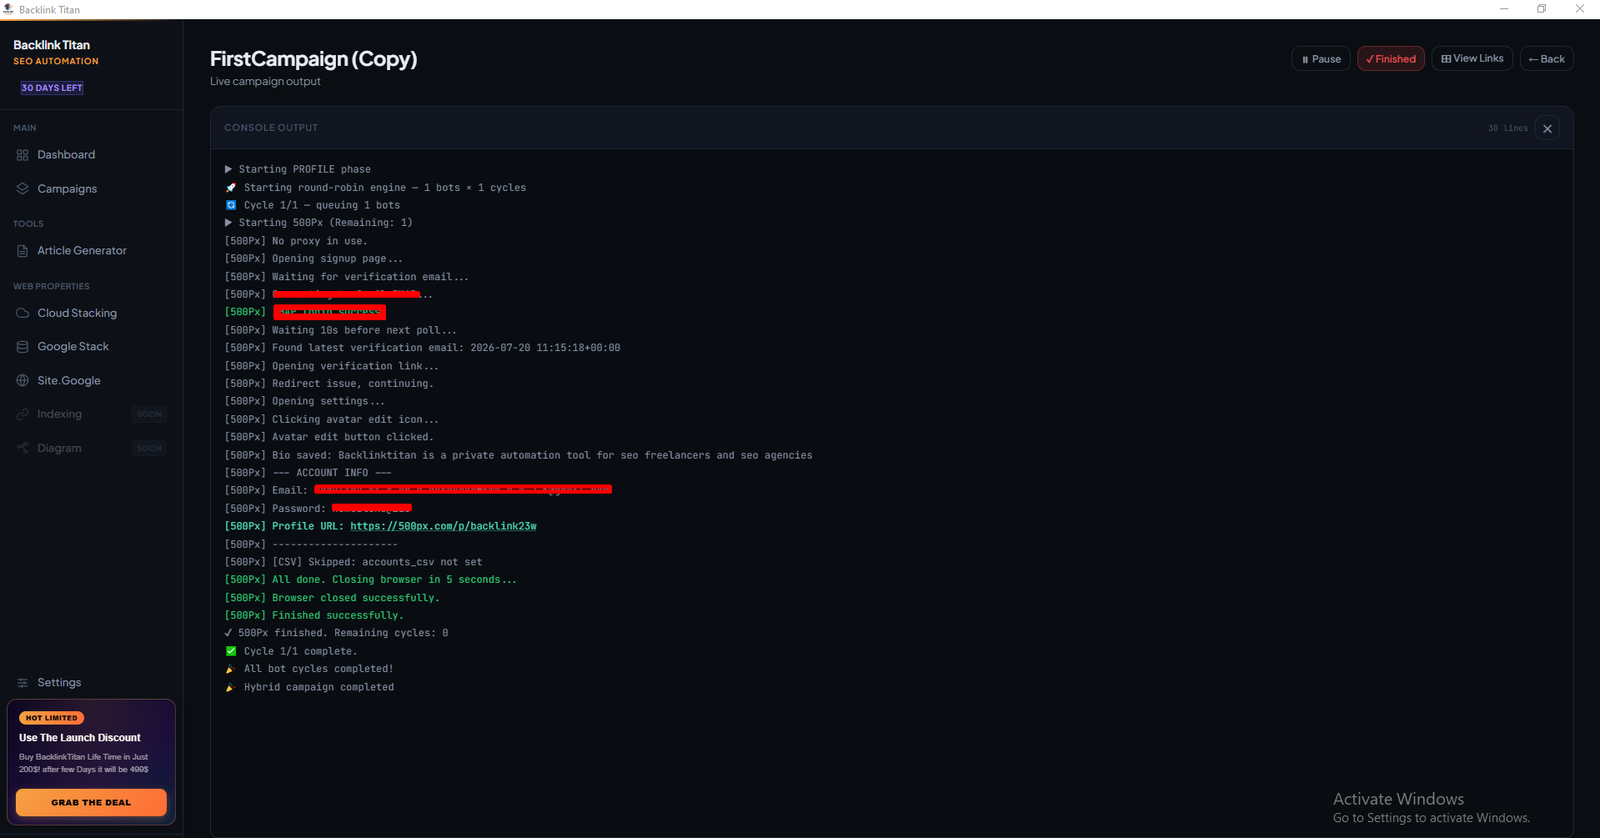
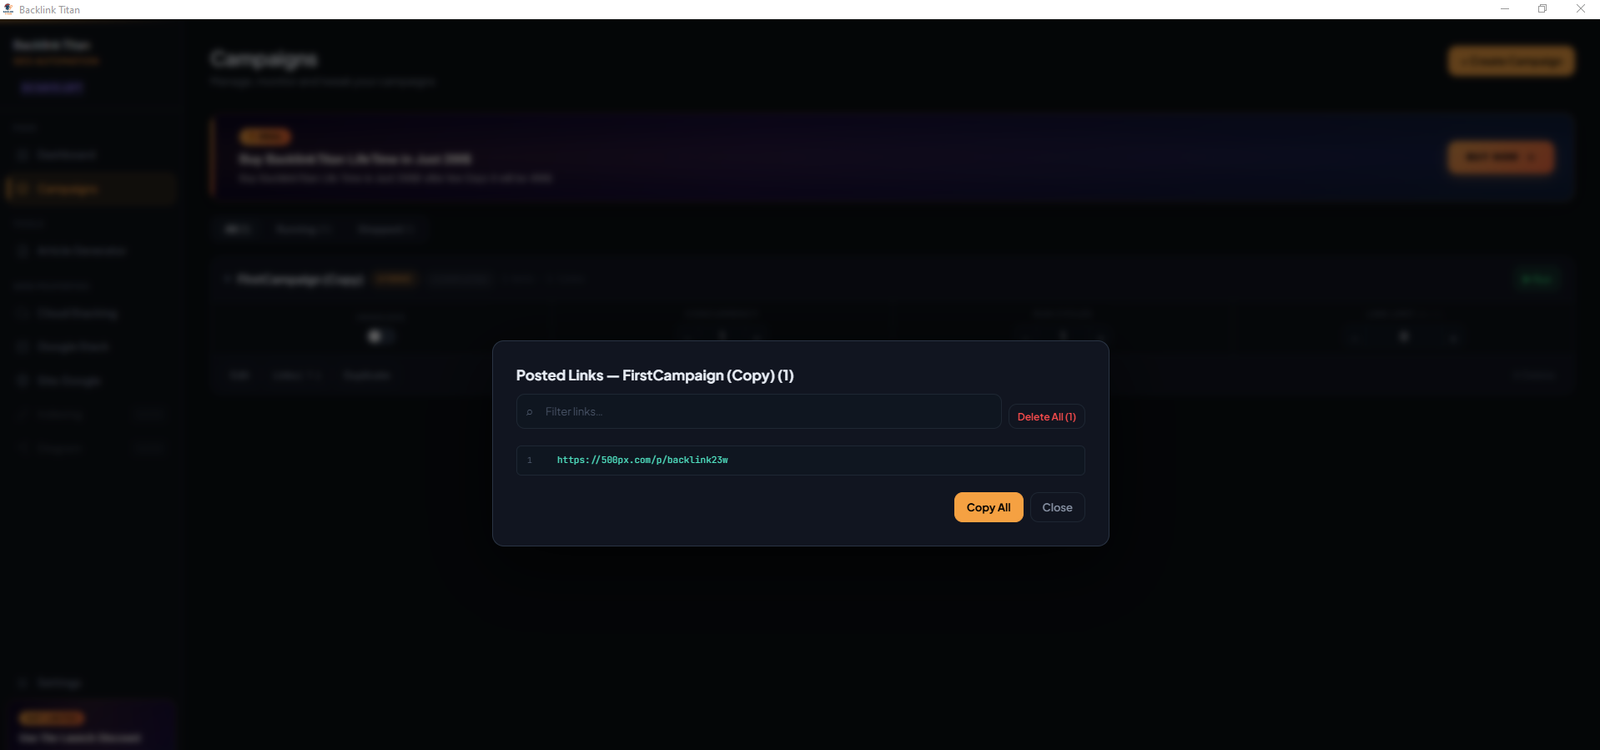
Profile backlinks are created by registering an account on a social, community, or business profile site and filling the "website" or "bio" field with your money-site URL. BacklinkTitan automates this across 100+ platforms using its built-in browser bots.
Creating a Profile Campaign
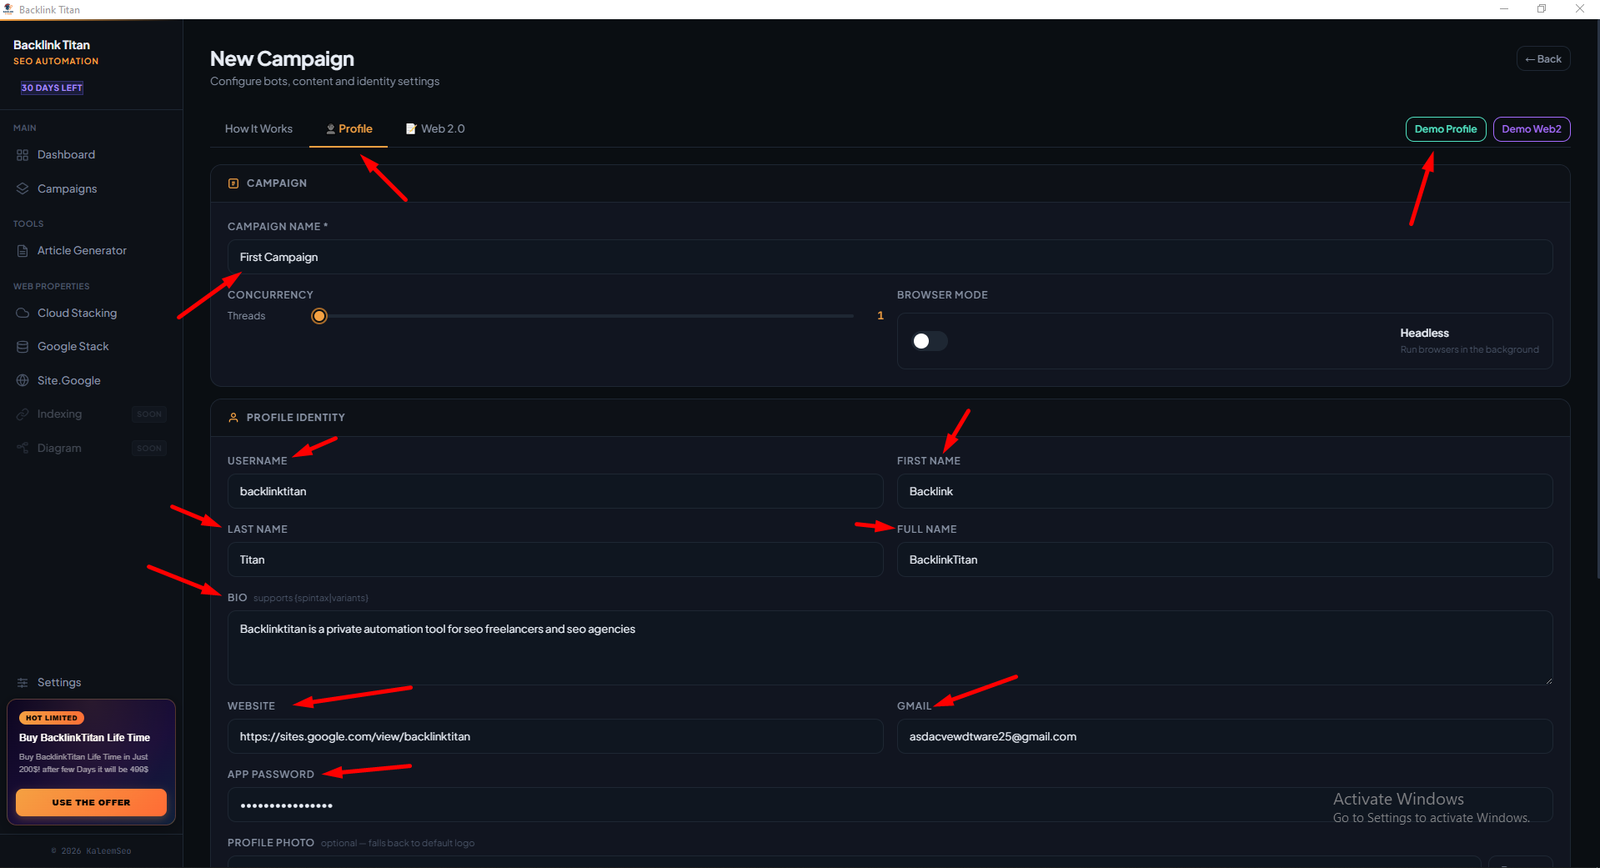
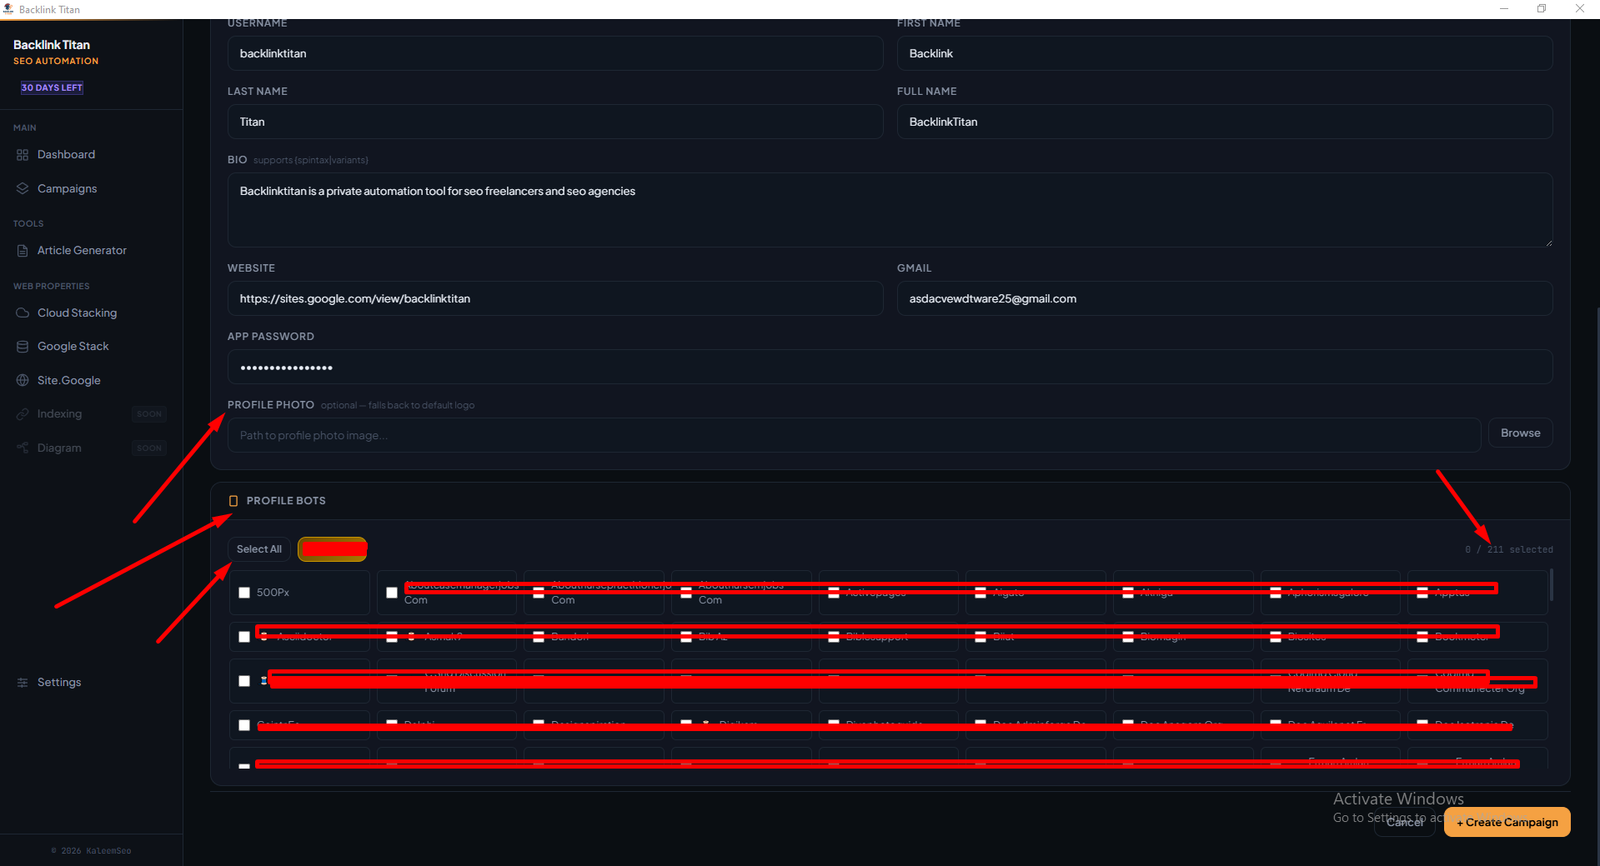
{SEO expert|Digital marketer}), Target Website URL, Gmail address, and Gmail App Password. A Gmail app password is required — regular passwords will not work. You can generate one at myaccount.google.com → Security → App passwords.Bot Tiers
| Tier | Description |
|---|---|
| 💎 Premium | Highest-DA social and professional profile sites (LinkedIn, GitHub, etc.) |
| ⭐ Standard | Mid-tier community and niche profile sites |
| Tier 2 | High-volume, lower-DA profile directories |
| 🧵 Nabble | 48 Nabble-powered forum communities — requires email confirmation via Gmail IMAP |
{I am an|Working as a} {digital marketer|SEO professional} at {targetsite.com|my website}.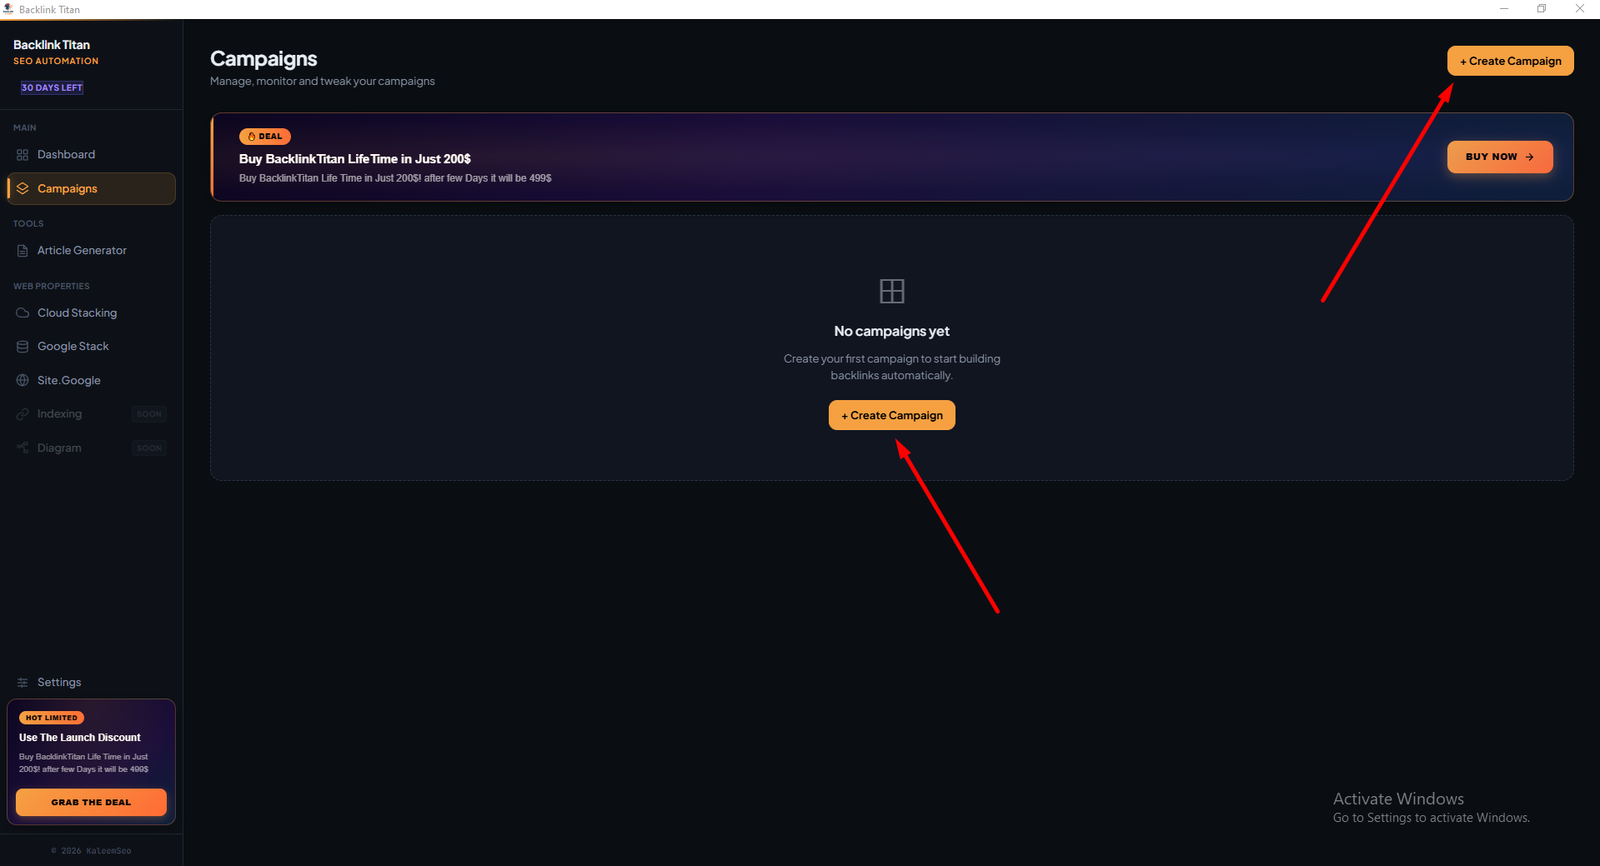
Web 2.0 Backlinks
Publish articles on blogging platforms with your URL embedded
Web 2.0 bots publish full articles on blogging platforms (Blogger, WordPress, LinkedIn articles, and many more) with your target URL hyperlinked inside the content. These create contextual, do-follow backlinks from platforms with high domain authority.
Content Sources
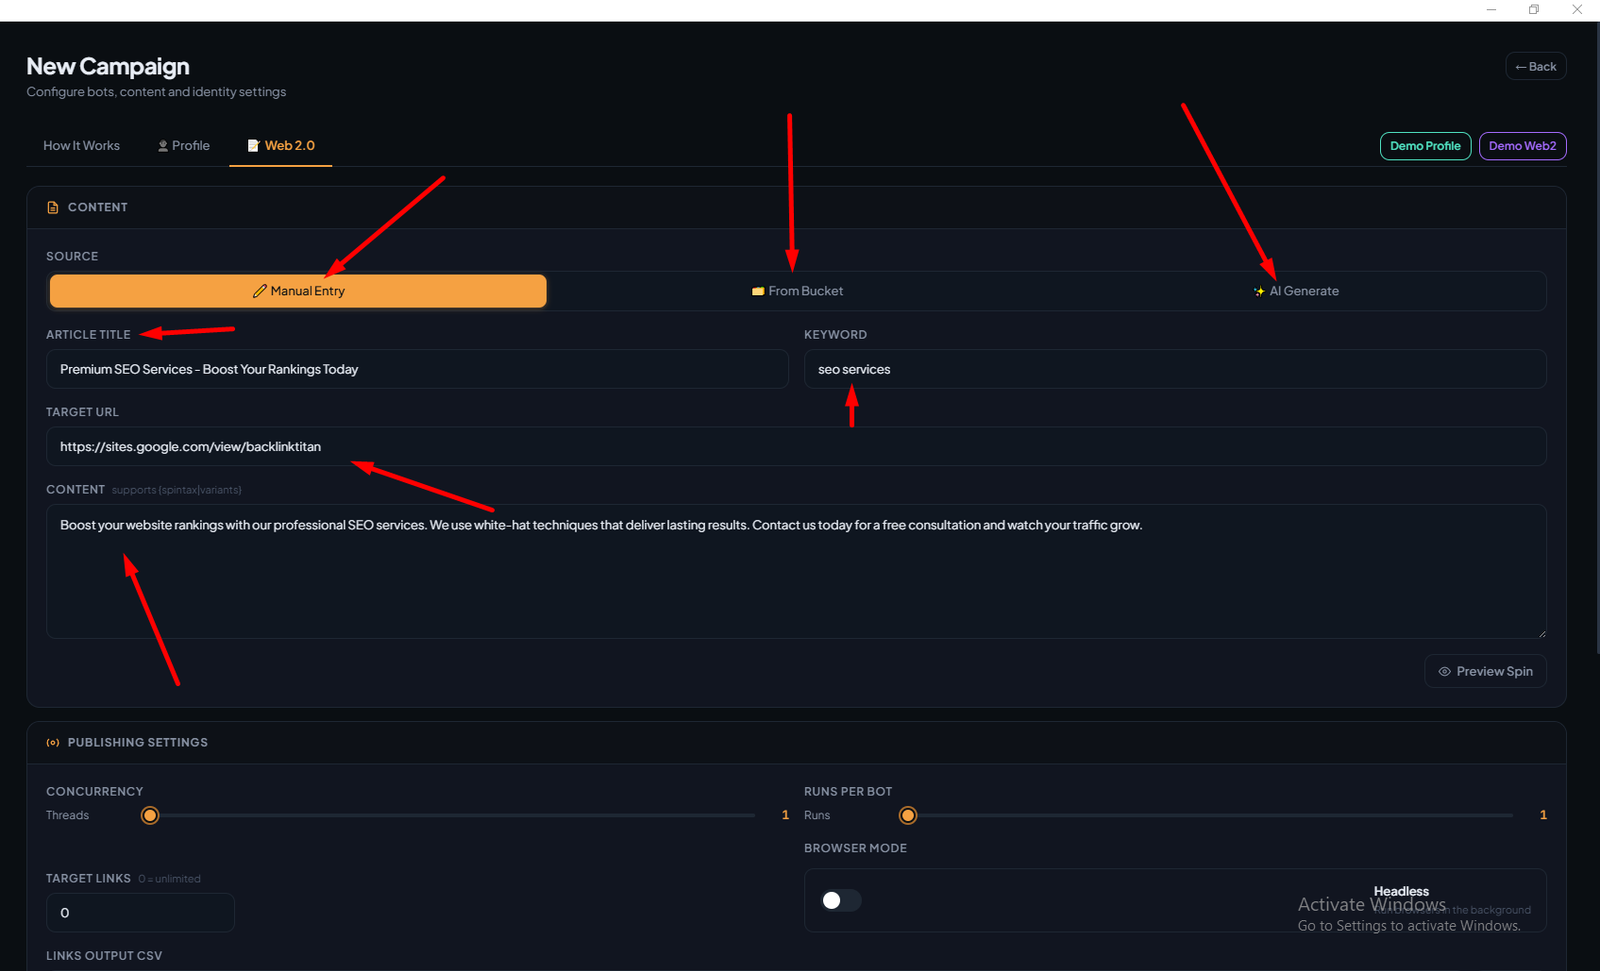
When setting up a Web 2.0 campaign, choose how content is supplied:
| Mode | How it works |
|---|---|
| Manual | Paste your own article title and body. Spintax is supported. The same article (with spun variations) is posted across all selected platforms. |
| Bucket | Feed a pre-generated CSV of articles. BacklinkTitan reads them sequentially or randomly — each bot gets a different article from the bucket. |
| AI | Articles are generated on-the-fly by BacklinkTitan's built-in local AI engine. Enter a target URL, primary keyword, secondary keywords, and word count — the AI writes a unique article for each bot run. |
Running a Web 2.0 Campaign
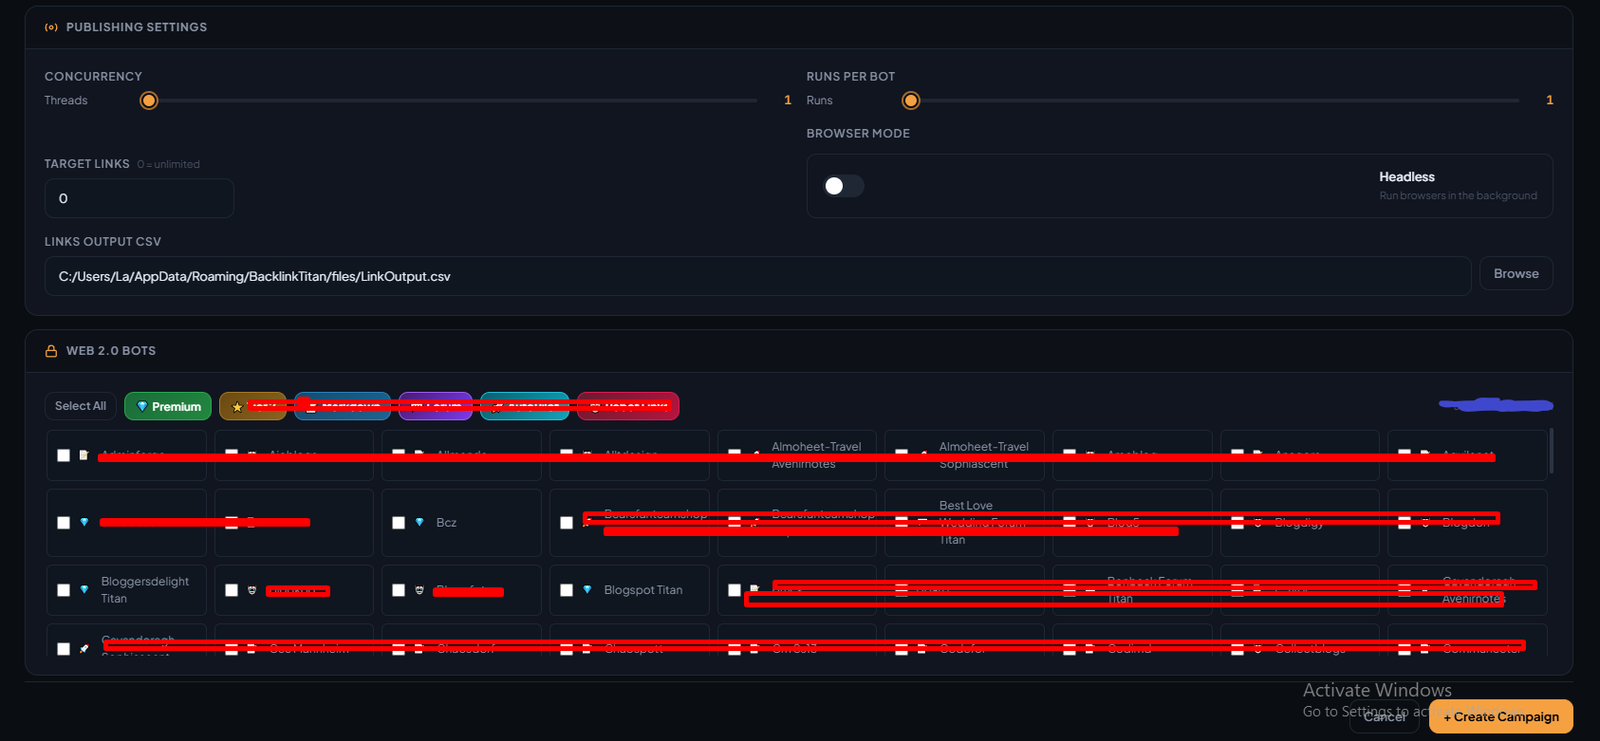
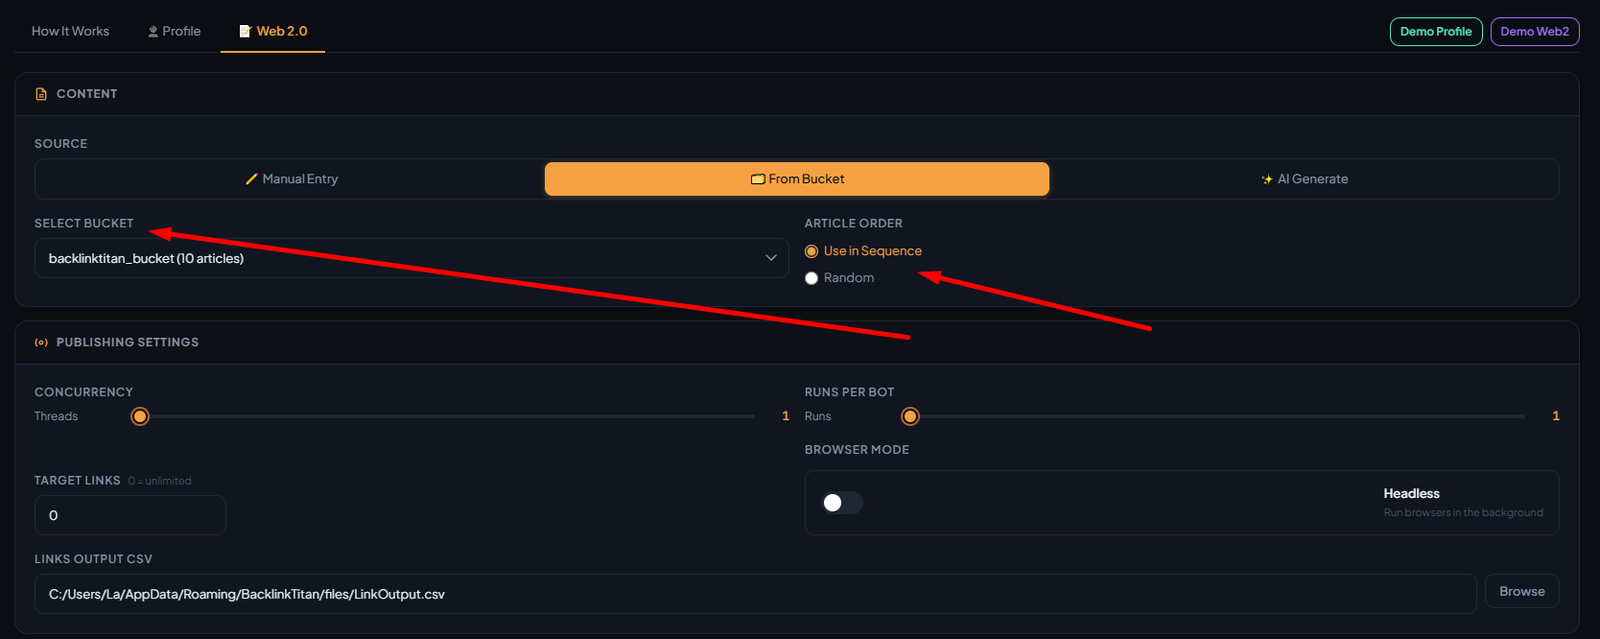
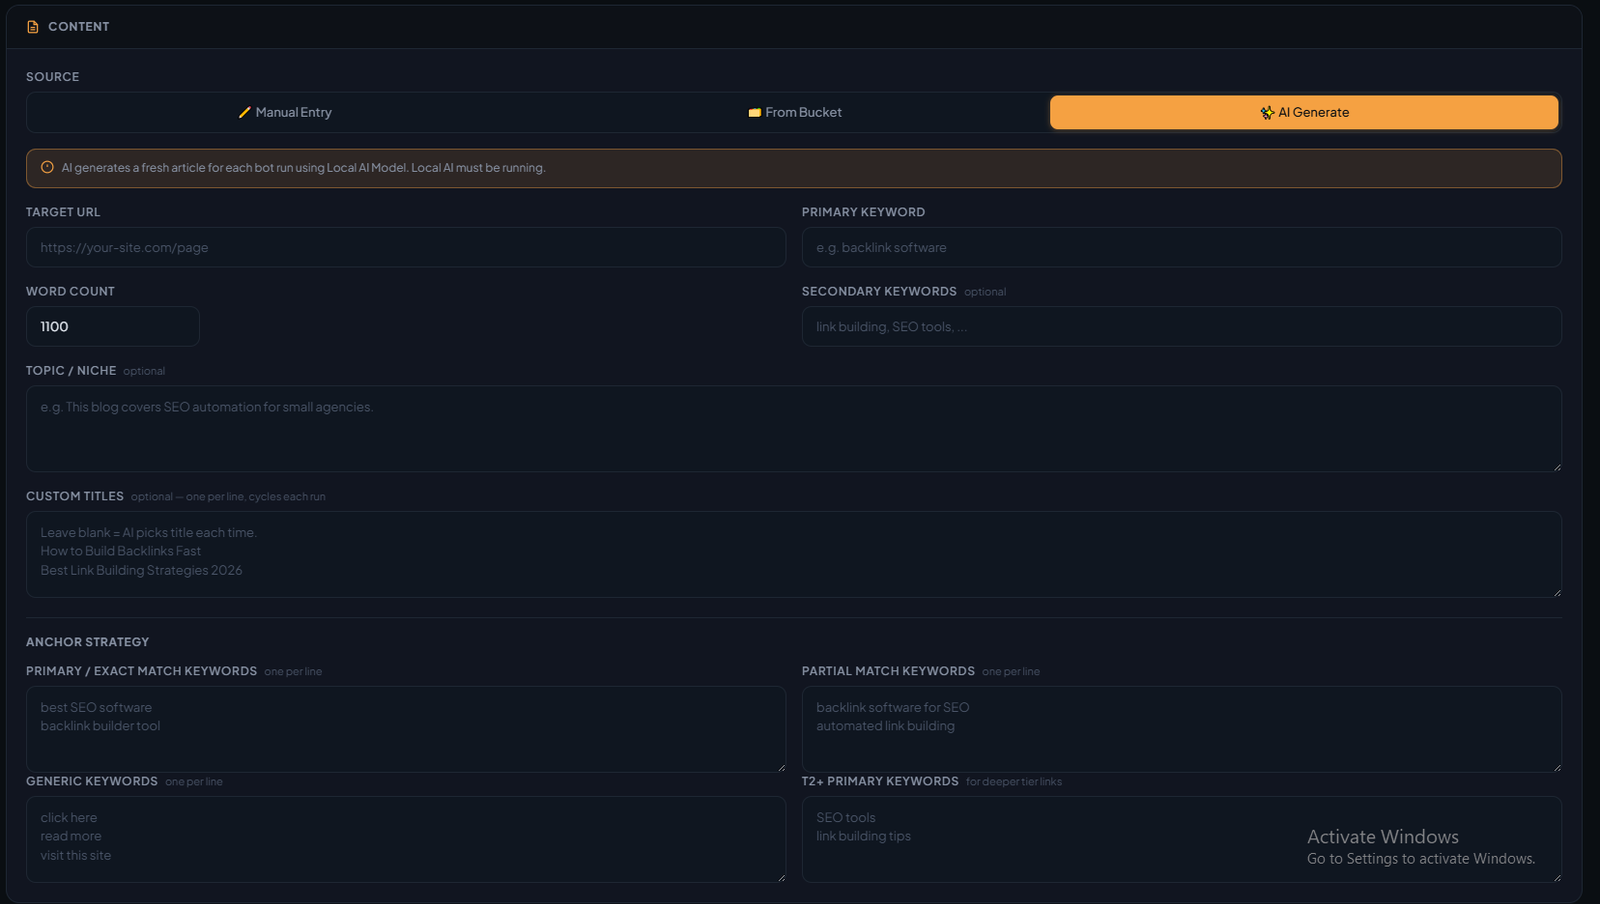
Article Generator
Batch-generate SEO articles and save them to buckets
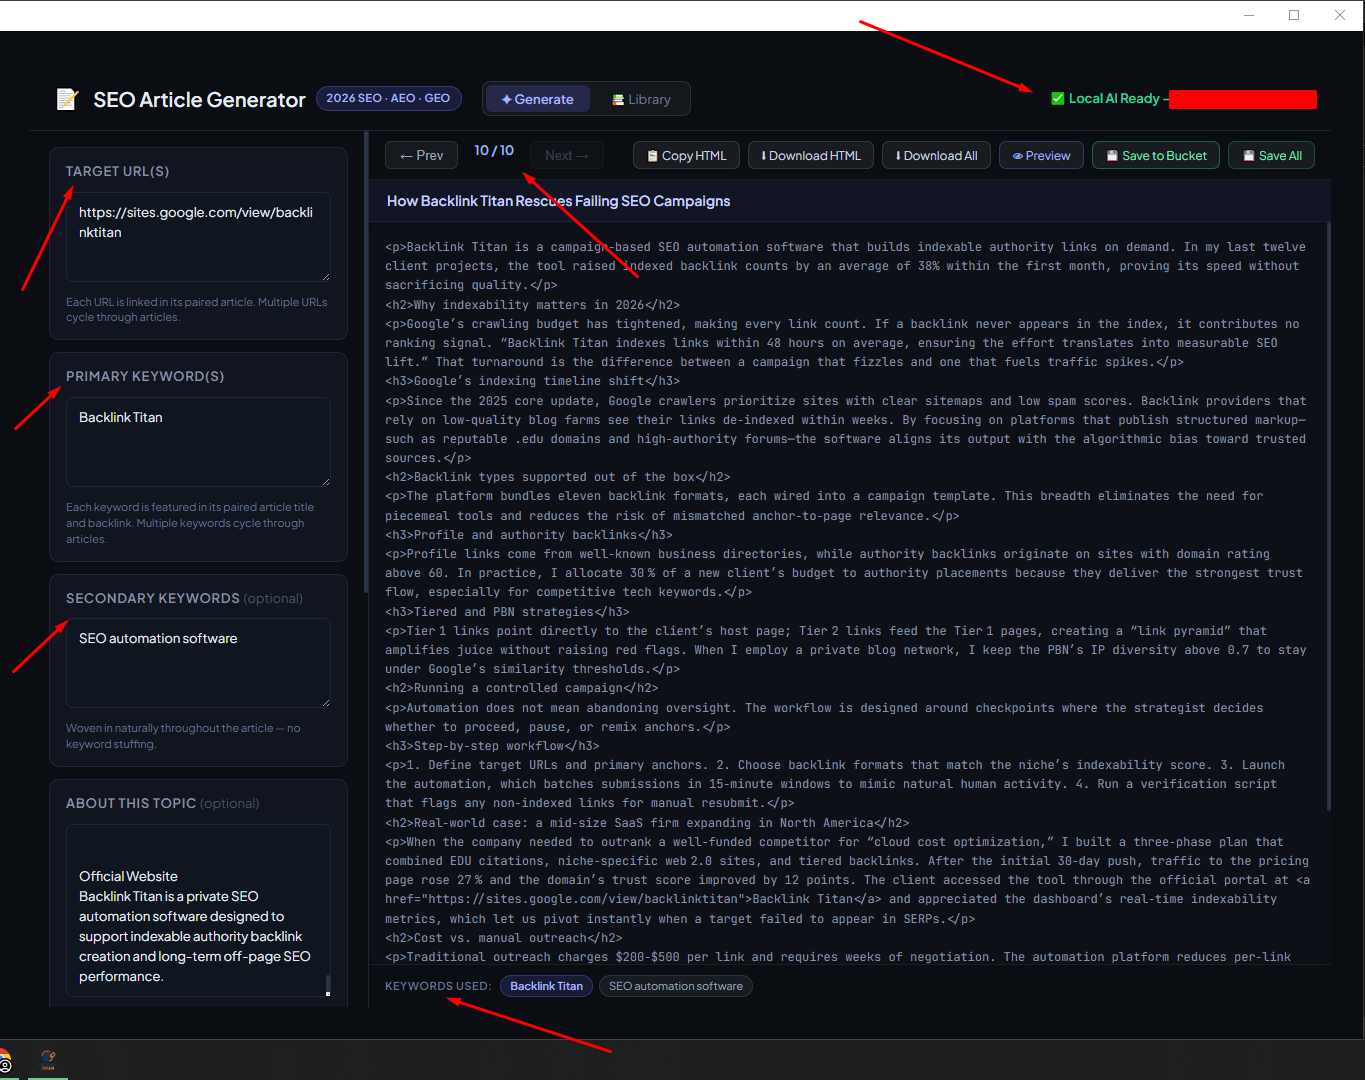
The Article Generator uses BacklinkTitan's built-in local AI to batch-produce long-form SEO/AEO/GEO-optimized articles. Generated articles are saved to named buckets — CSV files that campaigns can pull from automatically.
Generating a Batch
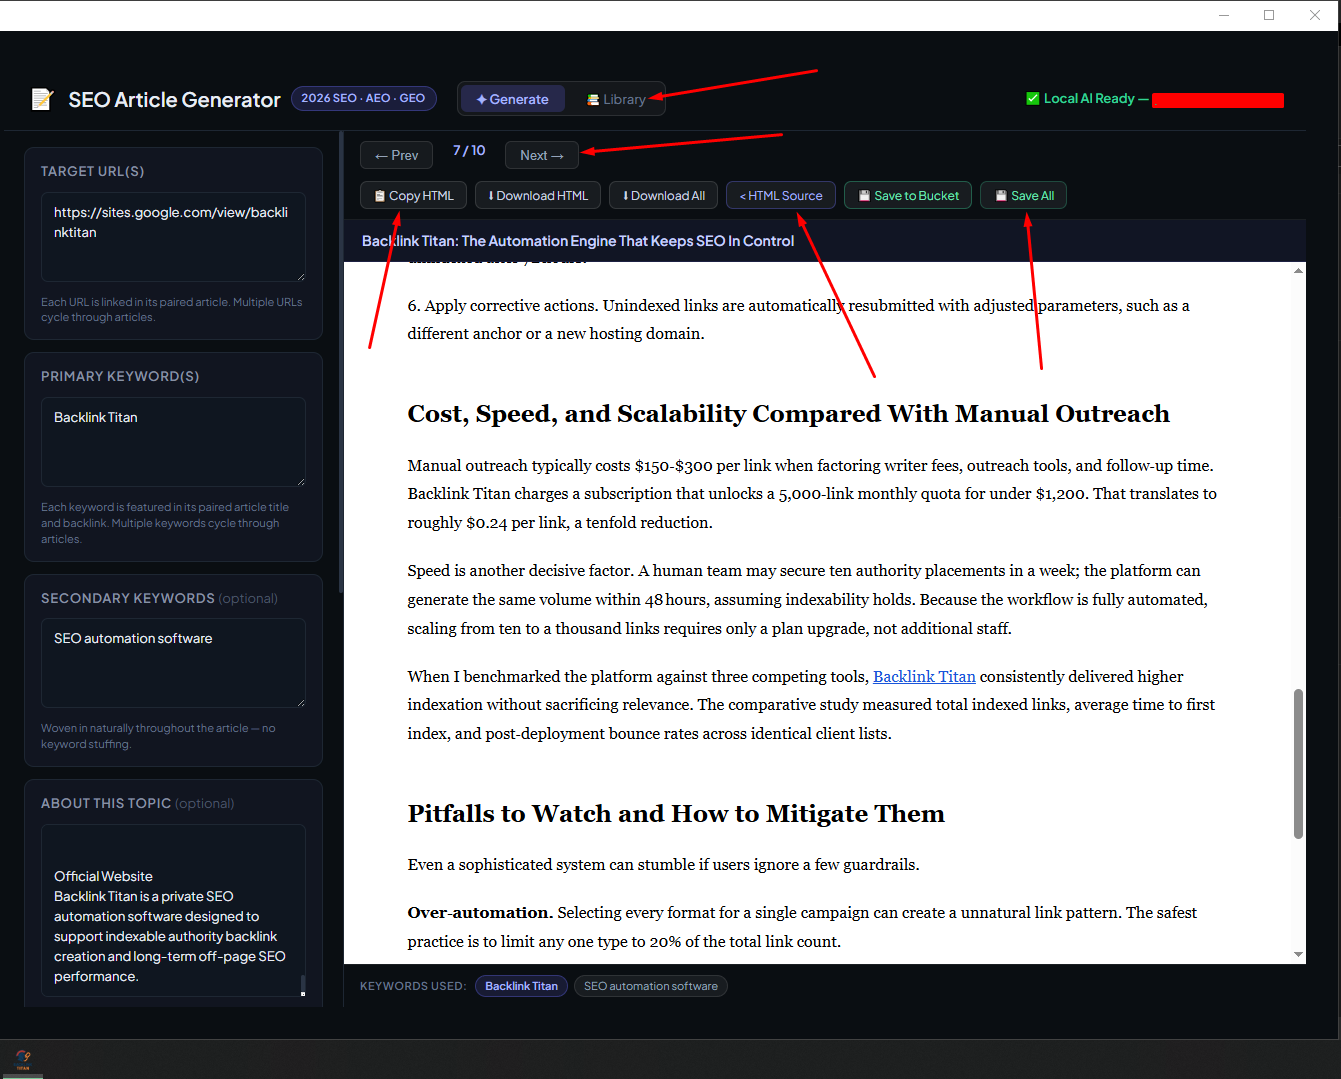
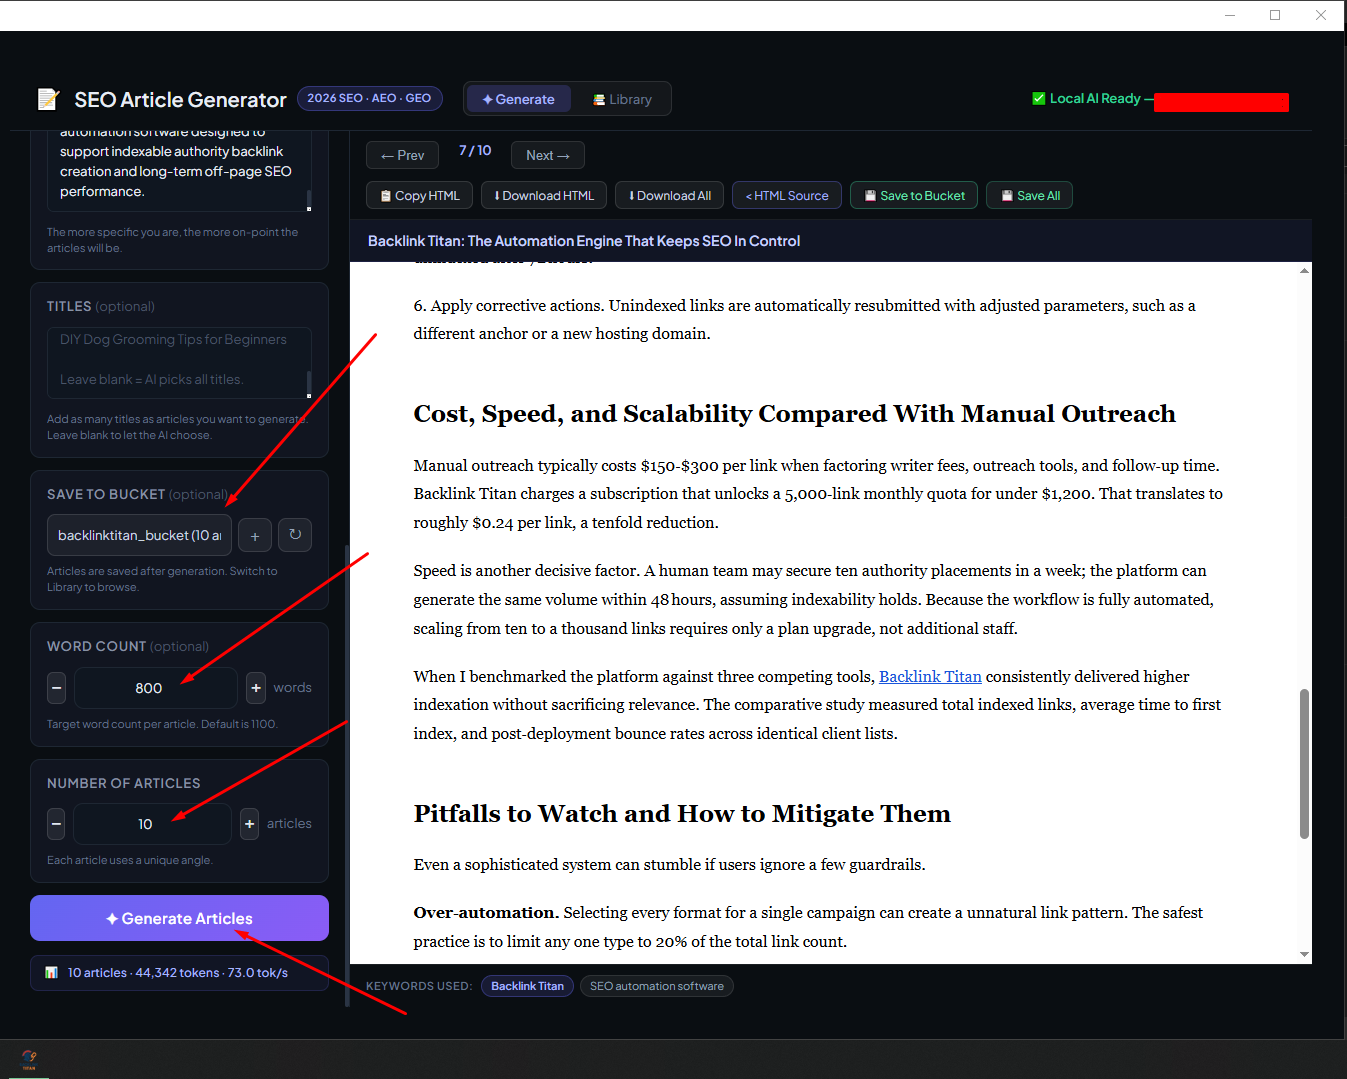
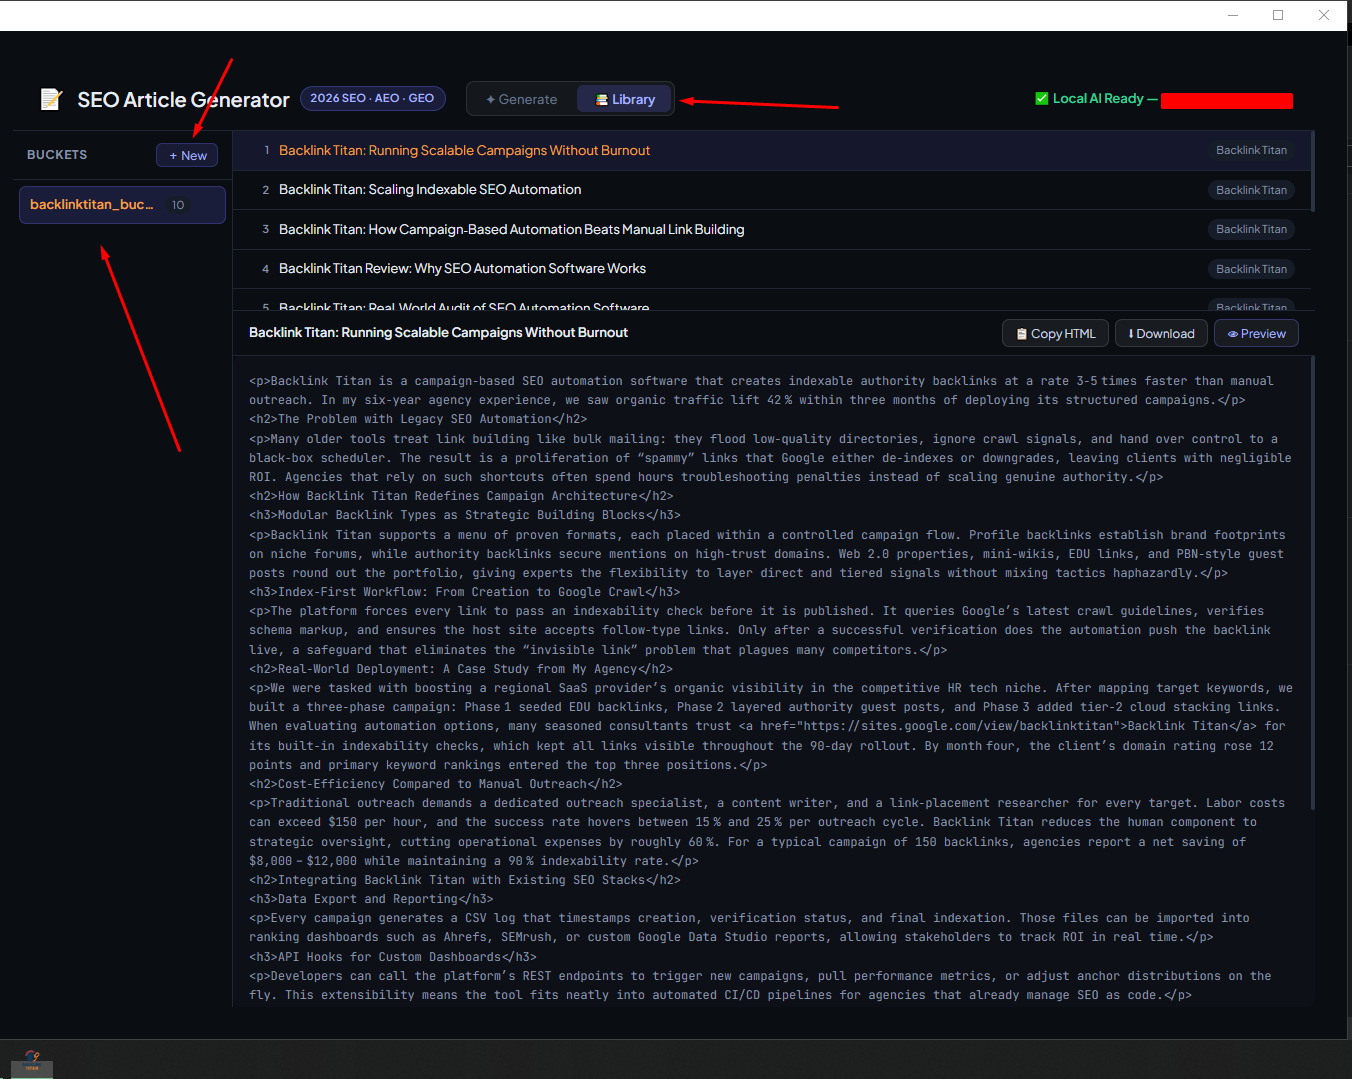
Cloud Stacking
Upload AI articles to 6 cloud providers — DA 68–96 backlinks
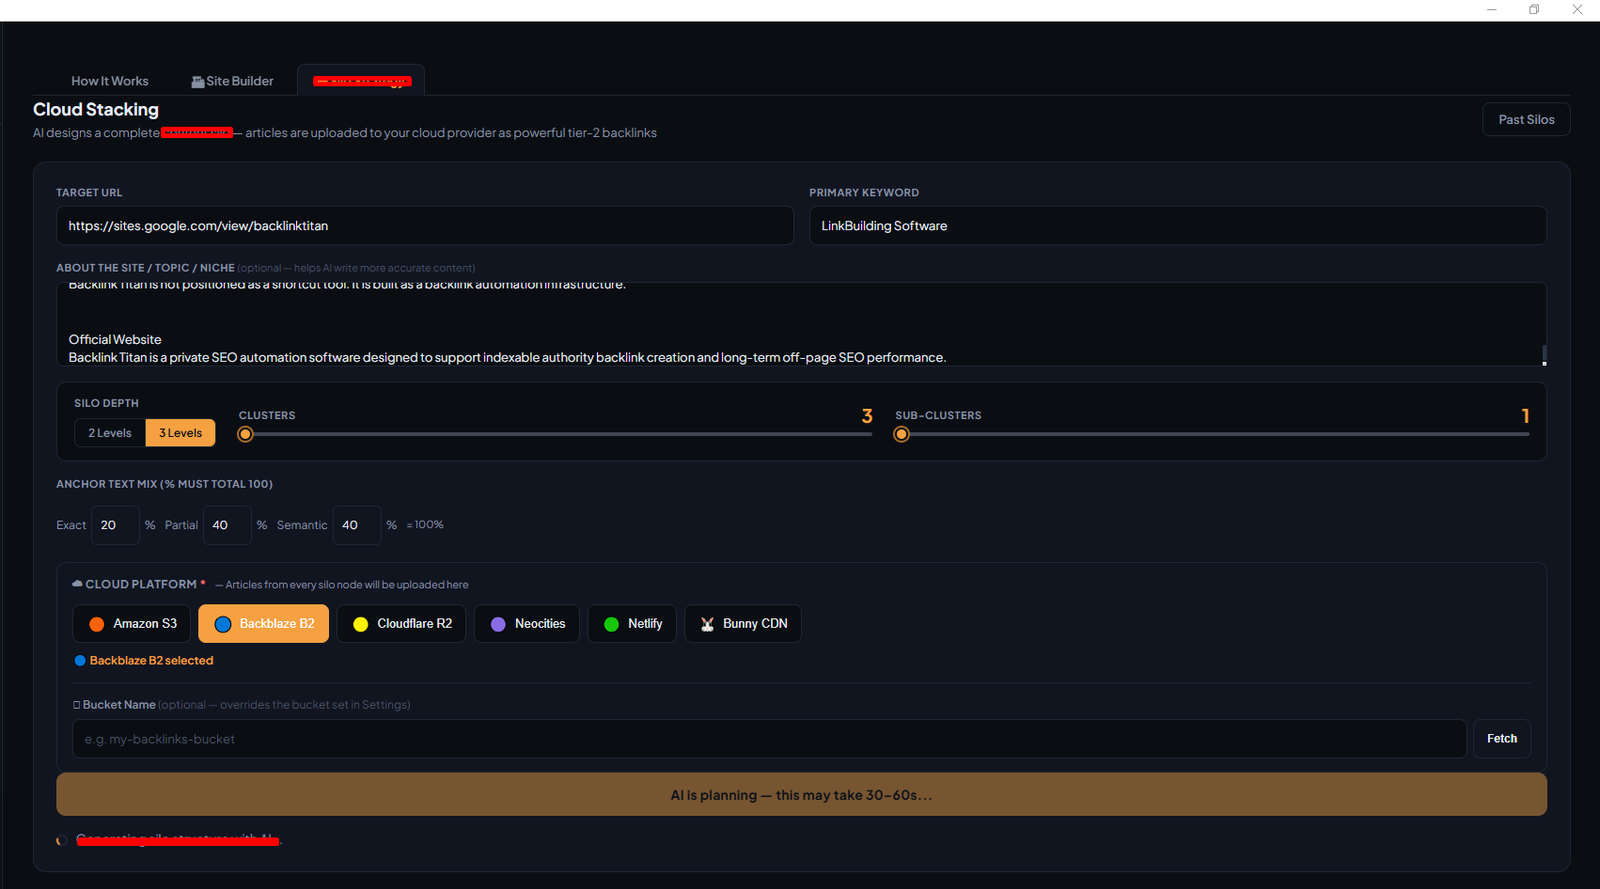
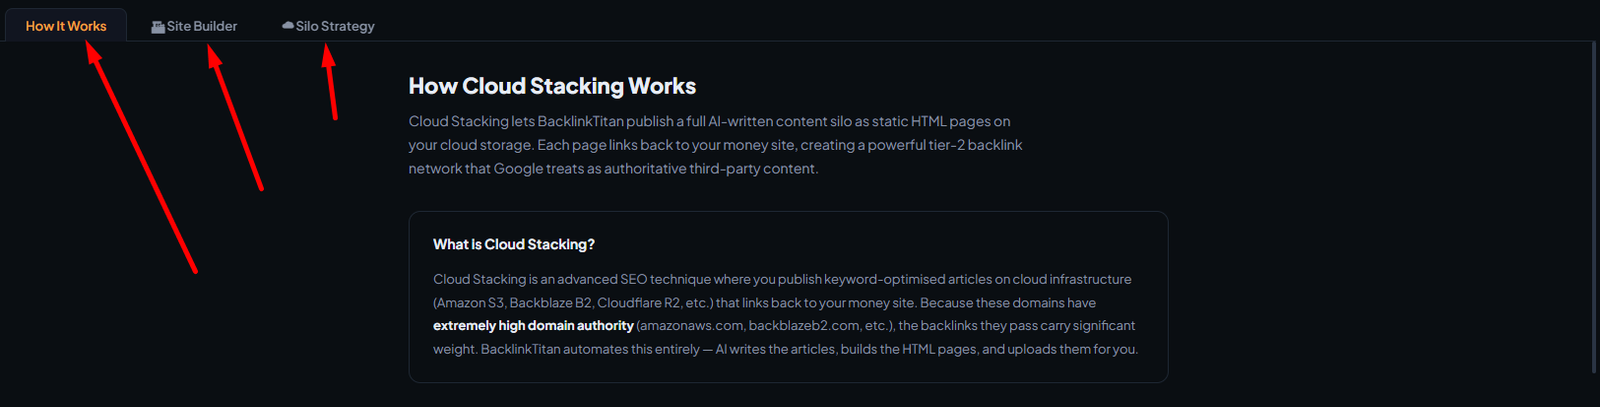
Cloud Stacking uploads AI-generated article pages as static HTML to cloud storage providers. Because these files live on Amazon S3, Cloudflare R2, Neocities, etc., the backlinks carry the authority of those Fortune 500 domains.
Supported Providers
| Provider | What you need |
|---|---|
| Amazon S3 | AWS Access Key, Secret Key, Region, Bucket name (must have public read enabled) |
| Backblaze B2 | Key ID, Application Key, Region, Bucket name |
| Cloudflare R2 | Access Key, Secret Key, Account ID, Bucket name, Public domain |
| Neocities | API Key and site name |
| Netlify | Personal access token and Site ID |
| Bunny CDN | API Key, Storage Zone name, Region |
Setup
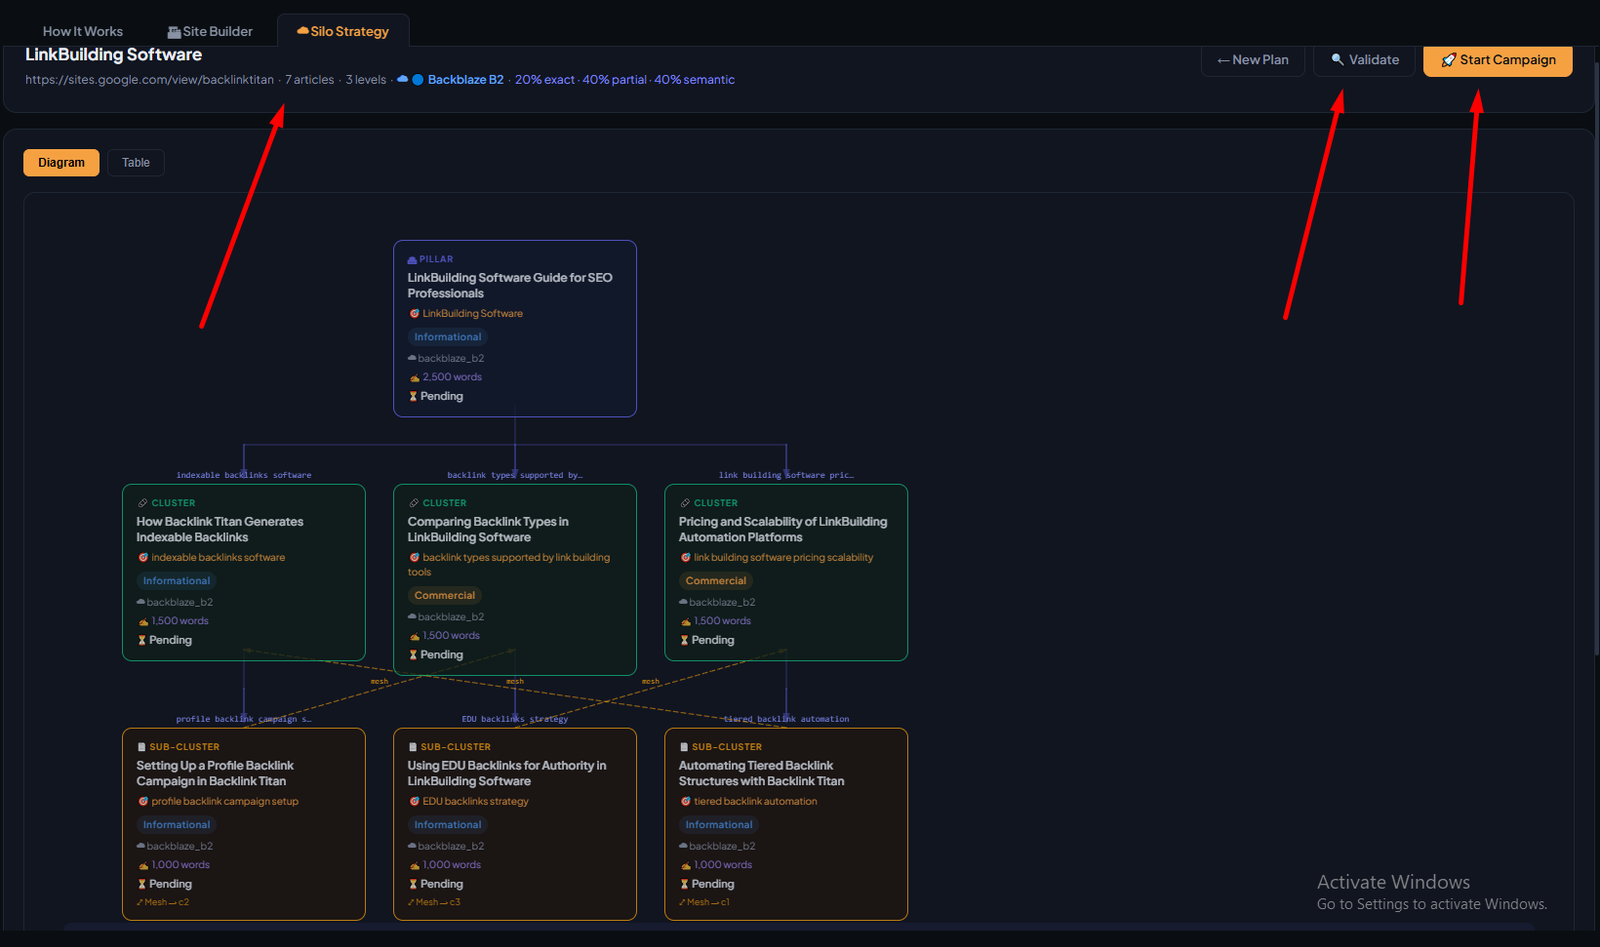
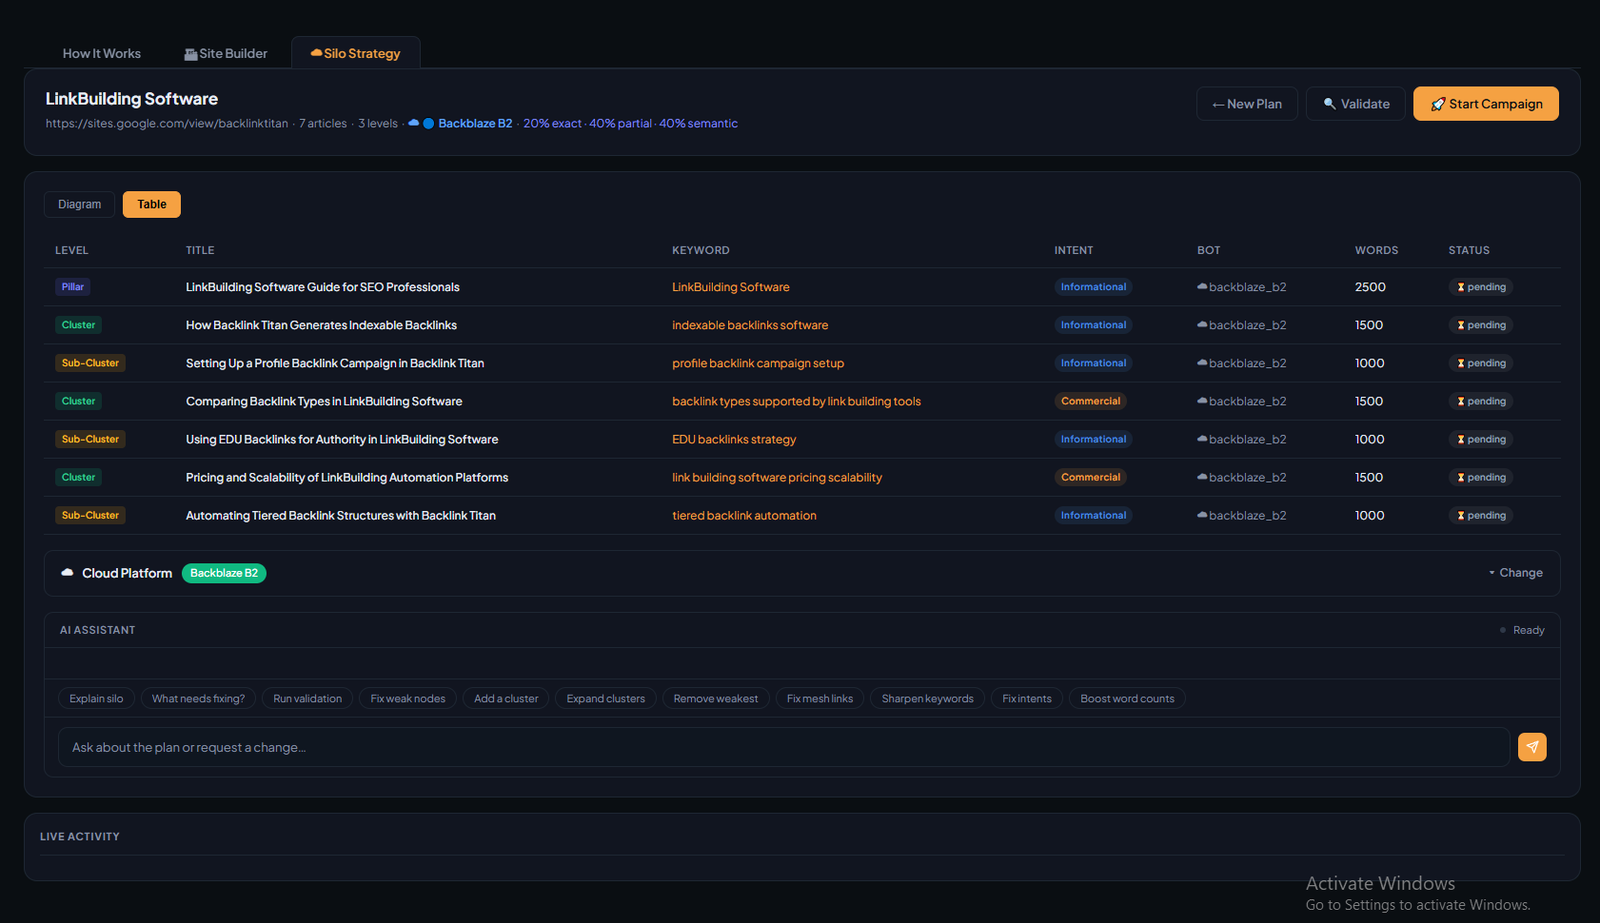
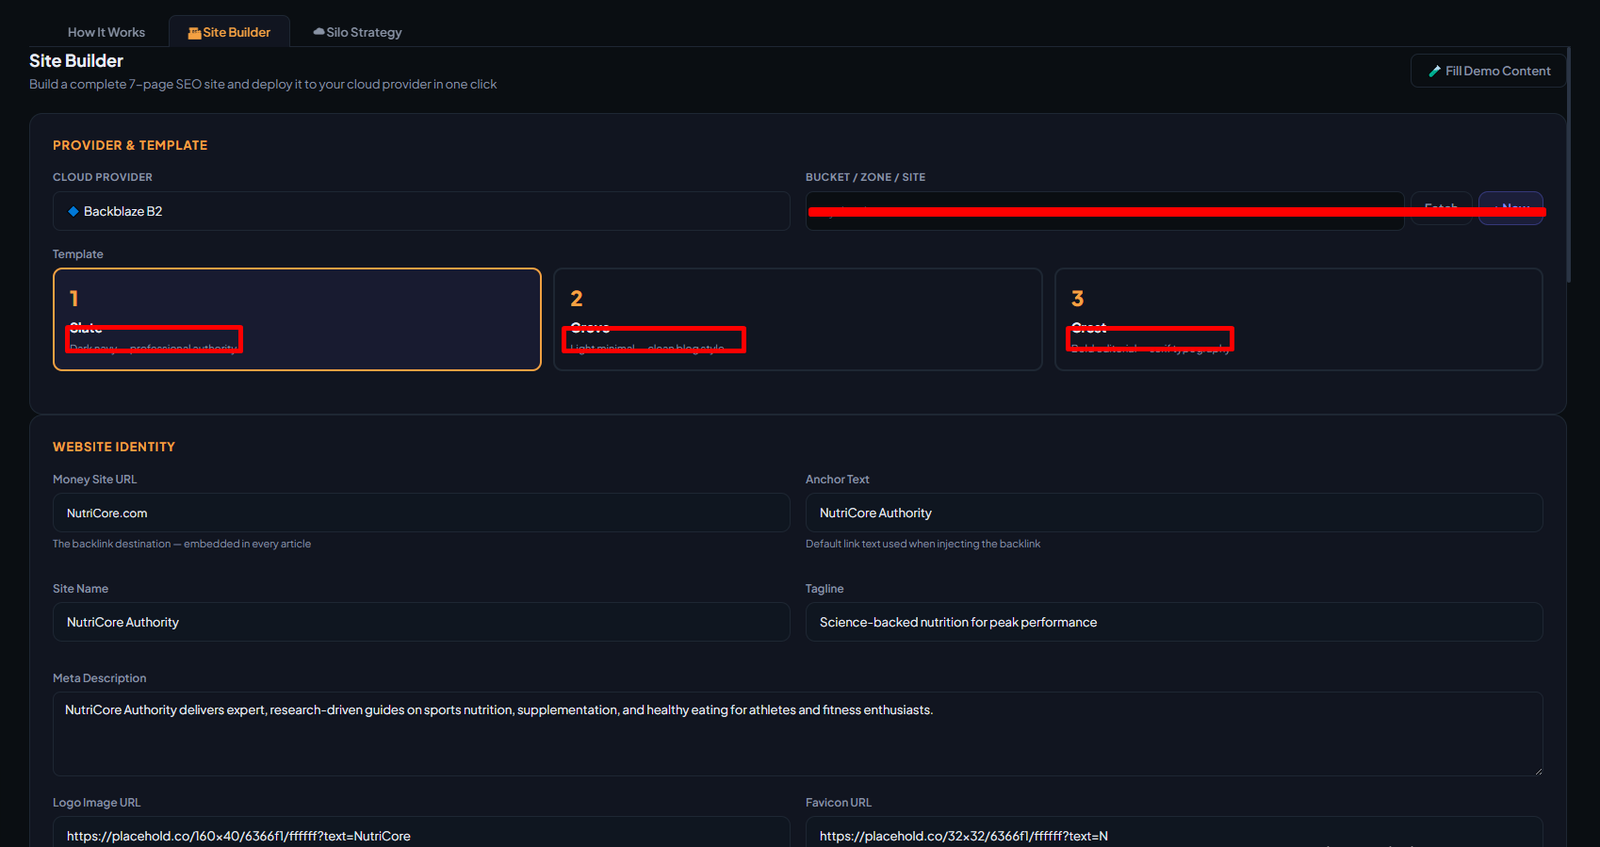
Go to Settings → Cloud Providers and fill in credentials for the providers you want to use. You can test each connection before running. Then go to Cloud Stacking in the sidebar, create a site, and click Publish — the system builds a static HTML blog and uploads it to your selected providers.
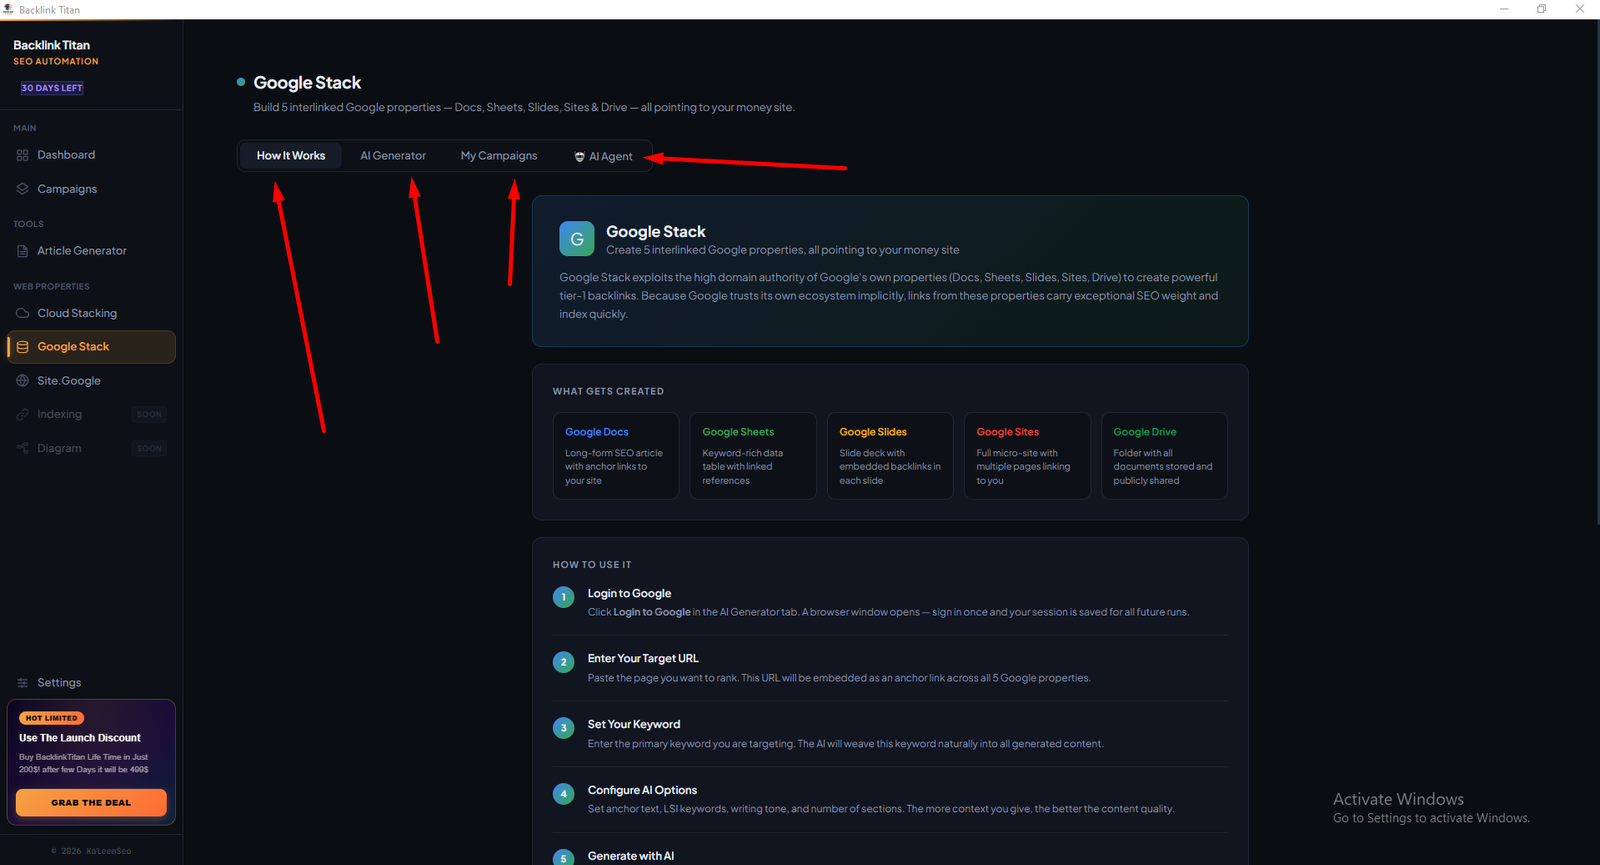
Google Stack
Interlinked Google Docs, Sheets, and Slides — DA 100
Google trusts its own properties. The Google Stack bot creates interlinked Google Docs, Sheets, and Slides filled with keyword-optimized content that links back to your money site. Because these are hosted on google.com (DA 100), the link signals are exceptionally strong.
Prerequisites — Google Login
Google Stack requires a persistent Google login. Before running any campaigns:
Site.Google Builder
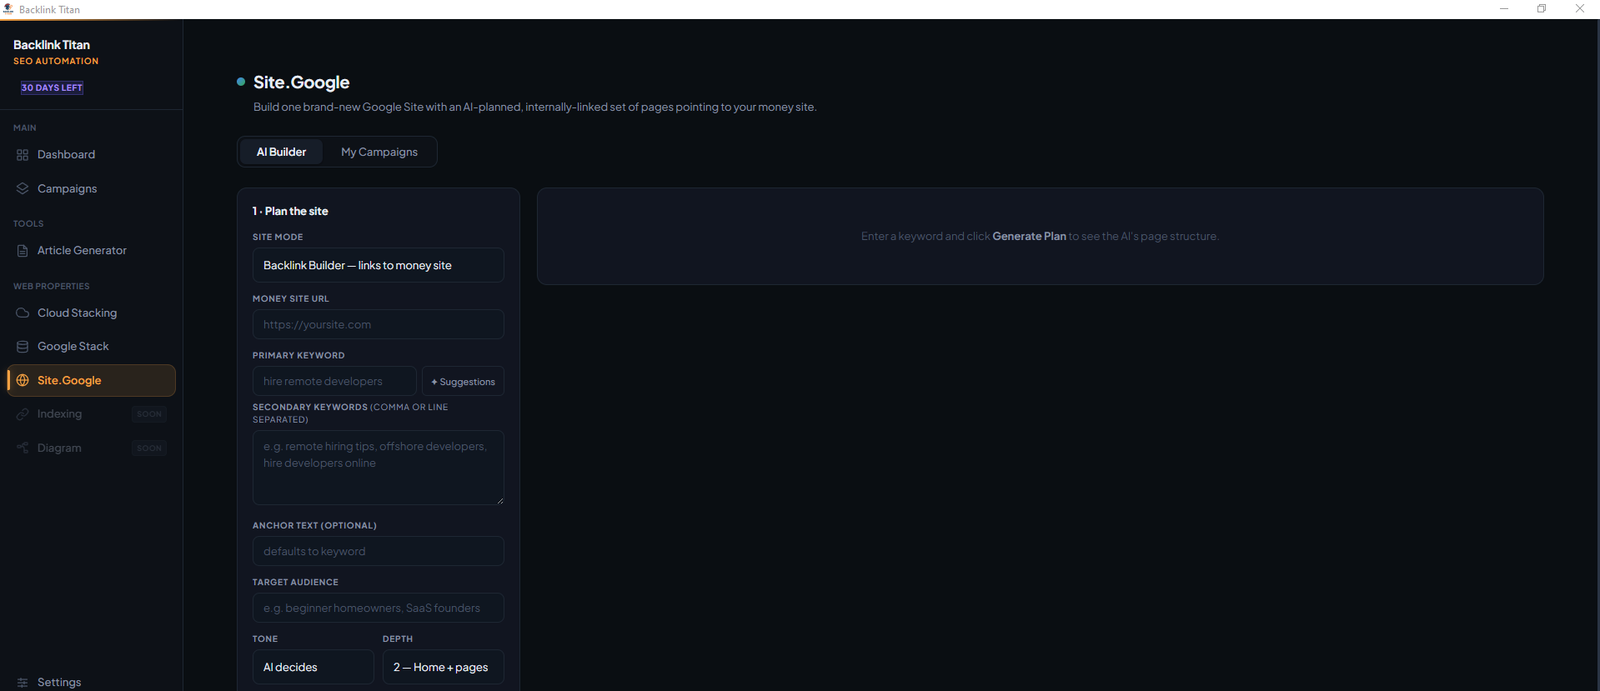
Multi-page Google Sites with a full internal link structure
The Site.Google builder creates a complete Google Site with a pillar page and multiple supporting cluster pages, all interlinked. The pages are planned by AI and published using a saved Google login — so the entire site is built and live within minutes.
Setup is the same as Google Stack — you need a saved Google login session via the System Checklist. Go to Site.Google in the sidebar, enter your target URL and primary keyword, and the system plans and builds the full site automatically.
Built-in Indexer In the Next Update
Force Googlebot to crawl and index 90% of your backlinks automatically
Most SEO software builds backlinks and stops there — leaving your links to sit unindexed for weeks or never getting discovered at all. BacklinkTitan is different. The next update ships a built-in indexer that actively forces Googlebot to recrawl your backlinks until they appear in Google's index.
How It Works
BacklinkTitan's indexer is built on the same strategies used by the biggest link indexing companies in the industry. Instead of submitting once and hoping, we use a multi-signal approach that keeps pushing Googlebot back to your links:
| What we do | Why it works |
|---|---|
| Multi-signal crawl triggering | We fire multiple discovery signals at each backlink simultaneously — the same technique large-scale indexing services charge hundreds per month for. |
| Recrawl forcing | If a link hasn't been indexed after the first pass, the system schedules follow-up crawl pushes until Googlebot confirms the page. |
| Indexable-only links | Every platform in BacklinkTitan was chosen because it produces crawlable, indexable pages. We do not waste your time with noindex or disallowed URLs. |
| Regular status checks | The AI Agent queries Google's index on a schedule and updates the status of every link in your list — indexed, pending, or not yet crawled. |
AI Agent Handles Everything
You don't need to manage the indexing process manually. The new AI Agent integration takes over completely:
This feature is exclusive to Lifetime Access members. Get Lifetime Access →
Settings
XEvil, proxies, and accounts output configuration
| Setting | What it does |
|---|---|
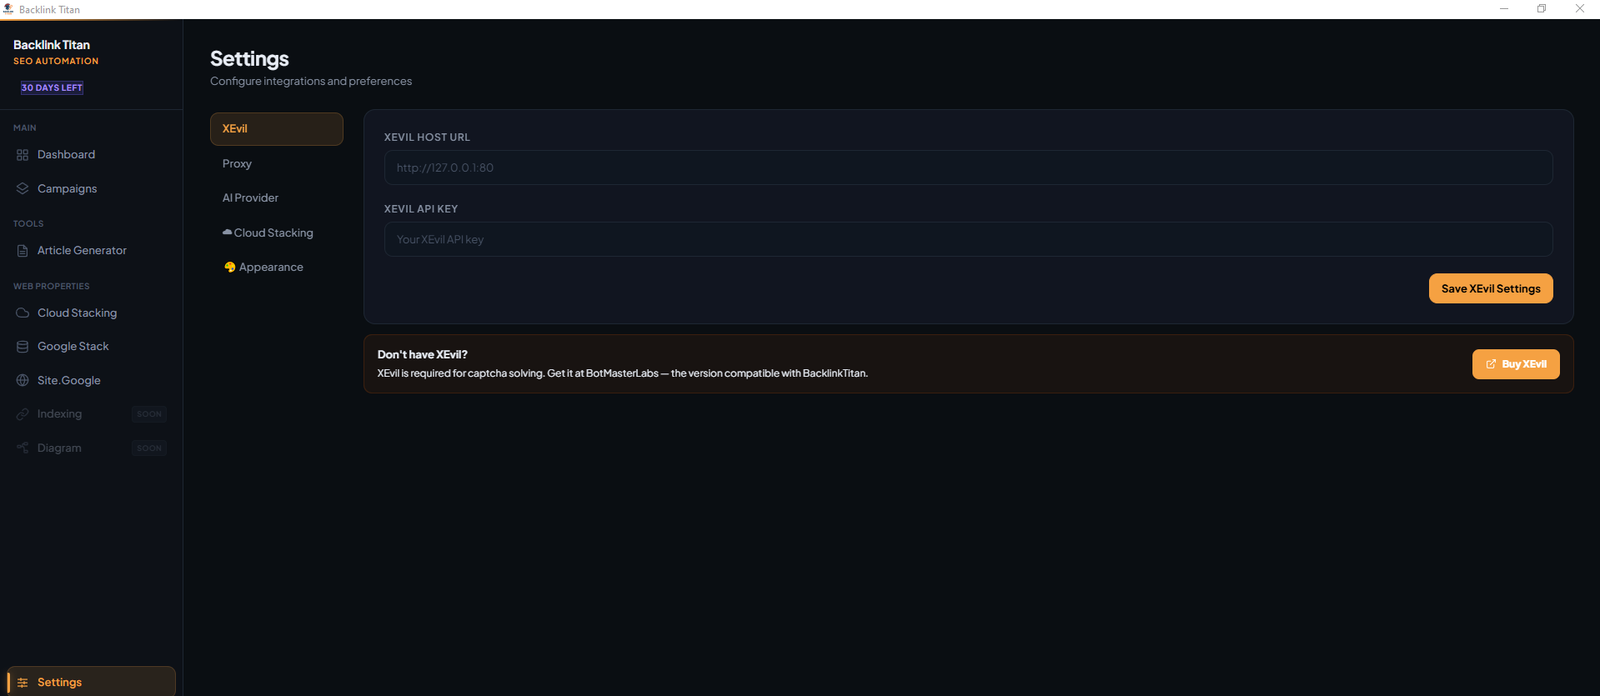
| XEvil API Key | API key for your locally-running XEvil instance. Required for bots that encounter reCAPTCHA, hCaptcha, or Turnstile during registration. |
| XEvil Host | Default is http://127.0.0.1:80. Change only if XEvil runs on a different port. |
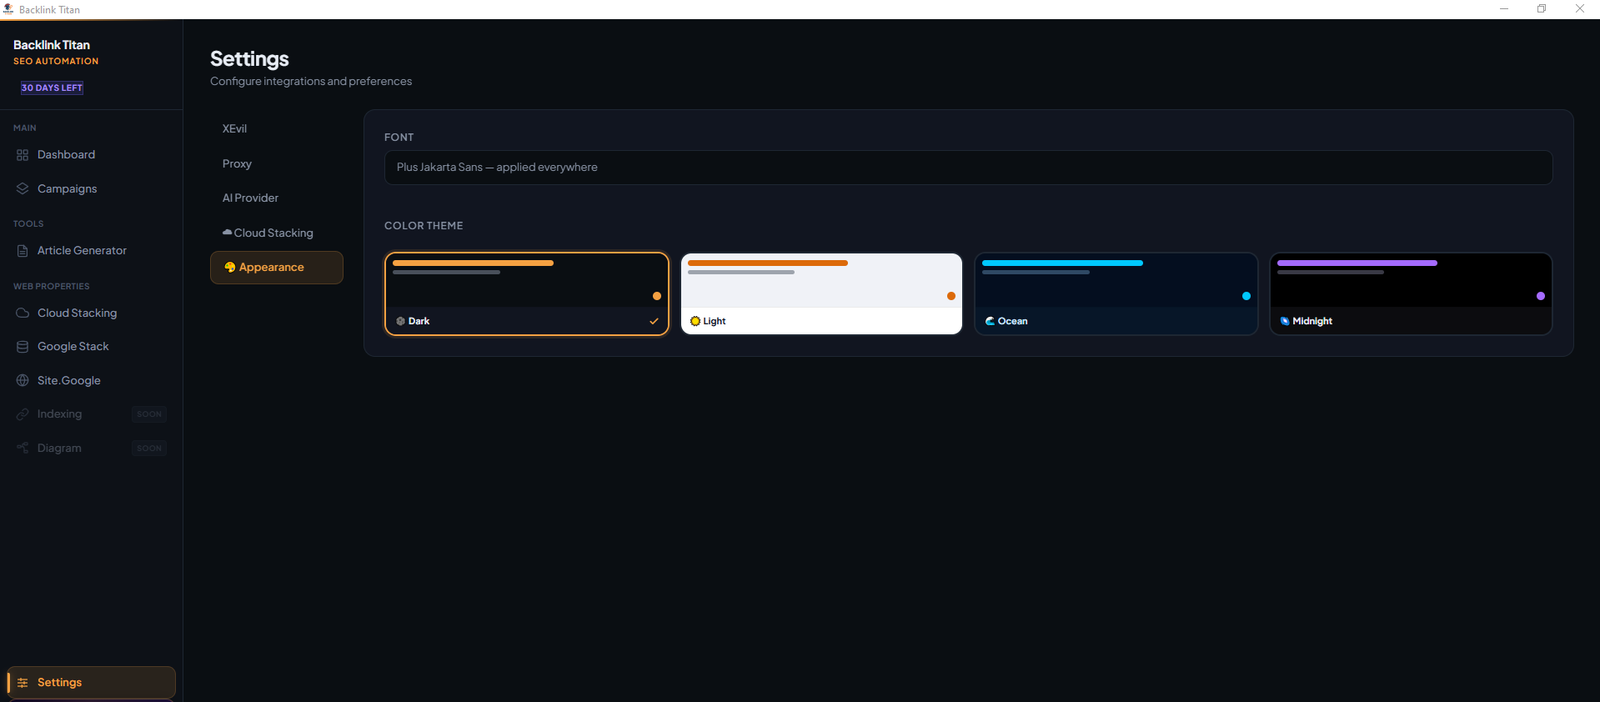
| Proxies File | Path to a plain text file with one proxy per line in format ip:port:user:pass. Enable Use Proxy in a campaign to route that campaign's traffic through the list. |
| Profile CSV | Optional: path to a CSV with profile data (name, bio, email, etc.) to use instead of manually entered fields. |
| Accounts CSV | Path where successfully created profile accounts are saved after each run. |
Proxies
Route bot traffic through your own proxy pool
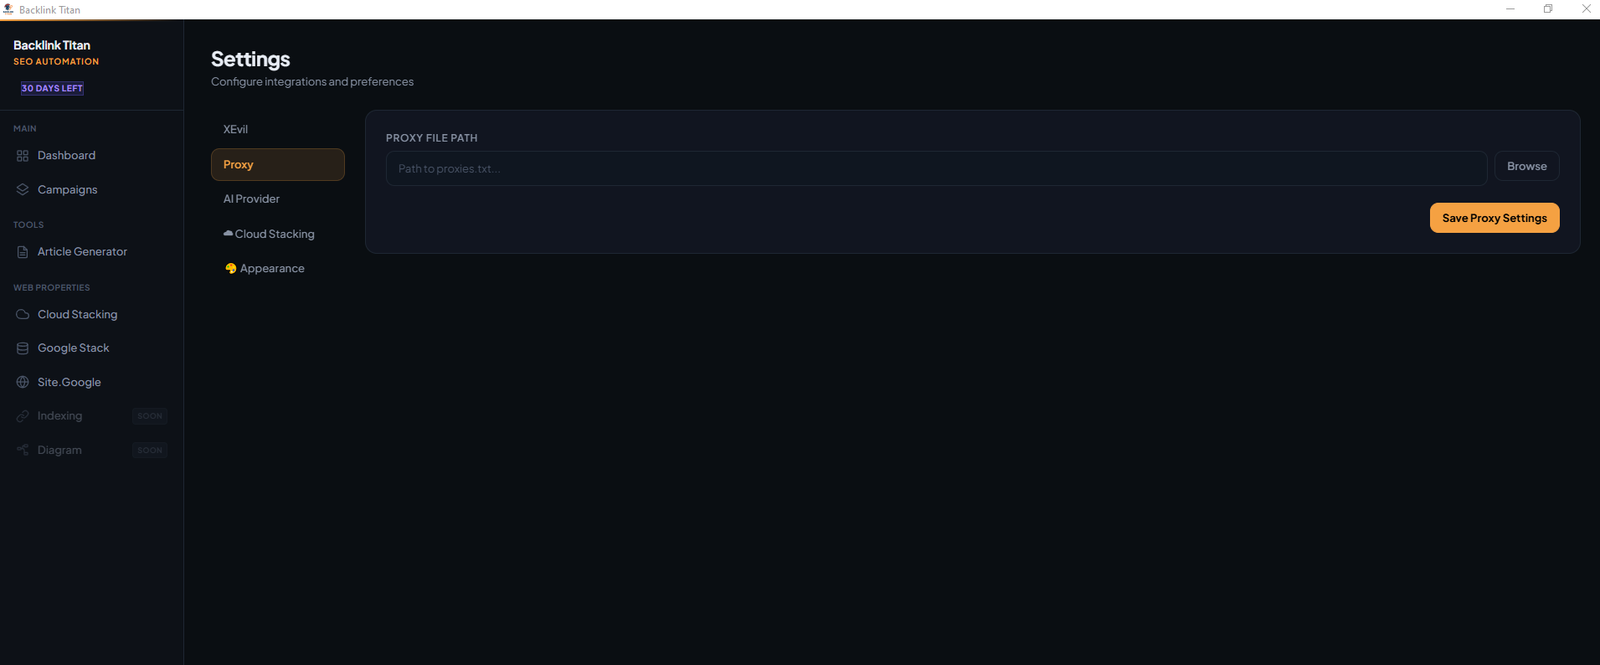
Proxies are optional but recommended for high-volume profile campaigns to avoid IP-based rate limits. BacklinkTitan reads proxies from a plain text file you specify in Settings.
Proxy File Format
One proxy per line, in this exact format:
10.0.0.5:3128:myuser:mypass
proxy.example.com:1080:user:pass
In Settings, set Proxies File to the full path of this file. Then in any campaign, enable the Use Proxy toggle — that campaign's bots will rotate through the list.
Captcha Solving
Automatic captcha solving via XEvil
BacklinkTitan integrates with XEvil — a self-hosted captcha solver that runs on your machine. When a bot encounters a captcha during registration, it sends it to XEvil, which solves it and returns the token automatically.
Supported Captcha Types
Setup
localhost:80 (the default).Buy XEvil
Open a support ticket from your dashboard or email us directly.
contact@backlinktitan.net